 Add Row
  Add
Add 


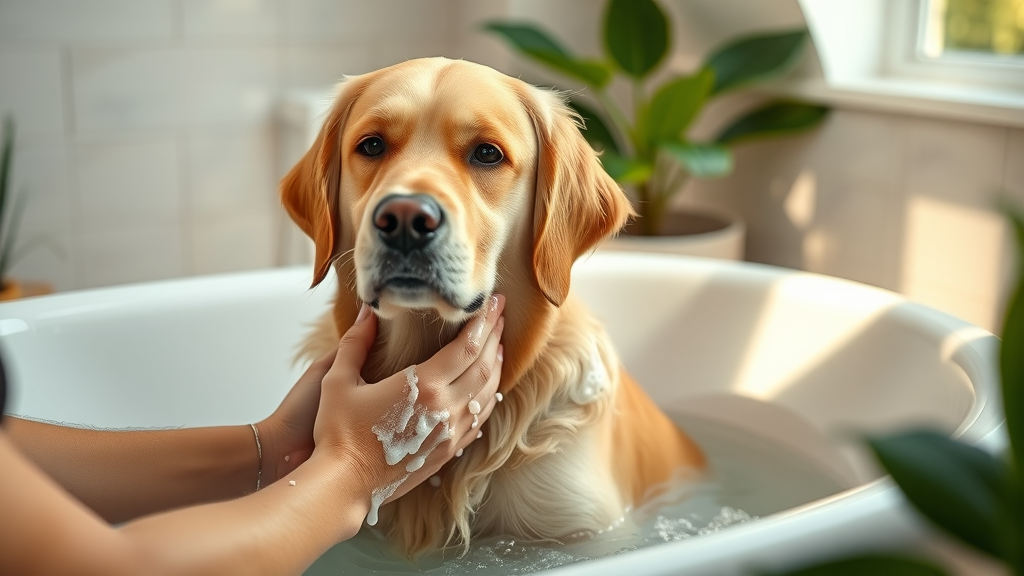
Ever wondered, "How do I clean my cat’s ears safely without causing stress or harm?" If you’re a cat owner, keeping your feline friend’s ears clean can be a surprisingly crucial part of their health. When your cat starts scratching their ears, shaking their head, or you notice a strange odor, you might be facing more than just a dirty cat ear. This guide answers your top questions, shares step-by-step ear cleaning methods, and spotlights common mistakes — making ear care at home simple, safe, and stress-free for both you and your cat.
Curious About How Do I Clean My Cat’s Ears? Safe Cat Ear Cleaning Starts Here
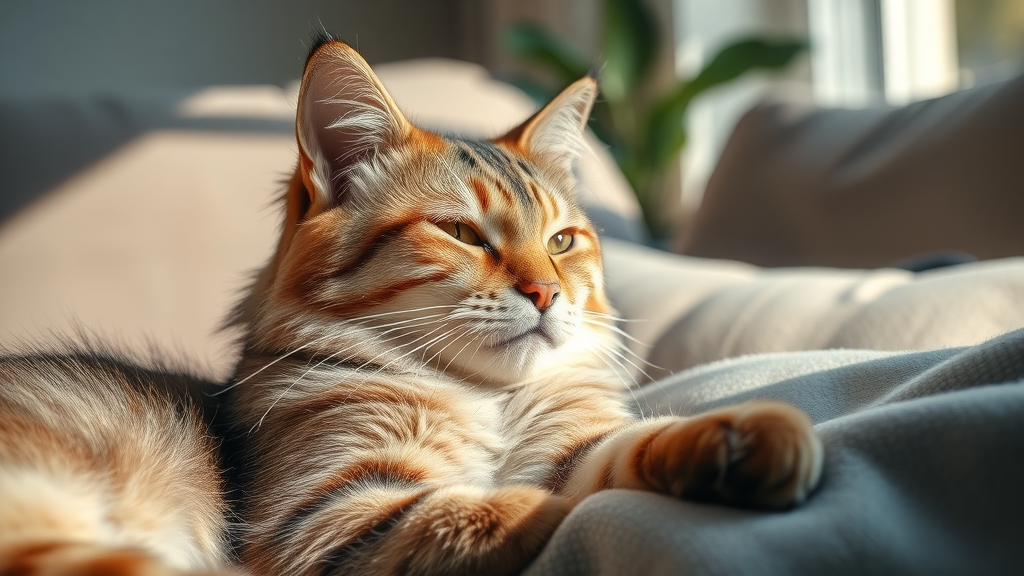
Cleaning your cat’s ears is an important part of their overall grooming routine, but knowing when and how to tackle this can be confusing for pet parents. Maybe you’ve spotted some wax buildup or noticed your cat shaking their head. These signs point toward the need for careful, effective ear cleaning—but did you know improper methods can actually lead to ear infections or damage? How do I clean my cat’s ears? is a question every responsible cat owner should ask, and the answer begins with recognizing when cleaning is necessary and choosing safe techniques.
Cats generally keep their own ears quite clean, but ear mites, wax buildup, or infections can cause dirty ears or discomfort. Before reaching for cotton swabs or home remedies, it’s vital to understand that feline ears are delicate—what works for humans may harm your pet. Safe cat ear cleaning starts with observation, the proper tools, and a gentle approach, especially if your cat is showing unique behaviors linked to uncomfortable ears. This section introduces you to trusted signs, preparation steps, and expert insights for cat ear care at home.
Are You Sure Your Cat’s Ears Need Cleaning? Recognizing Signs of Dirty Cat Ear Issues
Not every cat needs regular ear cleanings, but some signs should put you on alert for cat ear problems or the presence of ear mites . Watch closely for signals that indicate your feline’s ears have become too dirty and require your attention.
- Excess scratching or head shaking
- Visible dirt or wax
- Unusual odor or discharge
- Redness or swelling
If you notice persistent scratching or your cat’s ear flap looks irritated, these could be early clues of an underlying problem. Cats with ear mites often exhibit intense head shaking or a foul odor coming from the ear canal, while wax buildup may present as visible brown or black debris. Spotting these symptoms early and responding promptly helps prevent infection and keeps your cat’s ears clean—and your cat happy.
Preparing for Ear Cleaning: Tools and Environment for Cleaning Your Cat’s Ears at Home
Before starting to clean your cat’s ears at home , it’s essential to gather the right supplies and prepare a calm space. A well-prepared environment ensures ear cleaning is safe and as stress-free as possible—for both you and your pet. The correct ear cleaning solution, cotton balls (or pads) , and treats are your essentials. Consider cleaning your cat’s ears in a quiet room with good light, making it easier to gently inspect and clean without distractions.
Some cats are prone to wax or get dirty ears more often, so setting up everything before you begin will help you act quickly and confidently. Proper preparation protects the sensitive ear canal and makes cleaning your cat’s ears an easy part of their regular care routine. Below are expert-recommended tools and techniques for safe, effective cat ear care at home.
Choosing Ear Cleaner Solutions and Safe Products for Cat Ear Care
Selecting the right ear cleaner is crucial to keeping your cat’s ears healthy. Only use vet-approved ear cleaning solutions specifically made for cats. Avoid anything with alcohol, vinegar, or harsh chemicals—a small amount of commercial saline or a product recommended by your veterinarian is safest. Remember, some solutions intended for dogs or humans can cause irritation in the sensitive lining of the cat ear canal.
"Consult your veterinarian before using any ear cleaner or solution for ear cleaning to avoid potential irritation." — Dr. Emily Foster, DVM
Avoid homemade mixtures unless directly guided by a vet, as improper pH or ingredients can inflame or damage the ear flap and canal. Following your vet’s advice helps prevent infections and keeps ear cleaning gentle, effective, and safe—especially for cats prone to wax or infection.
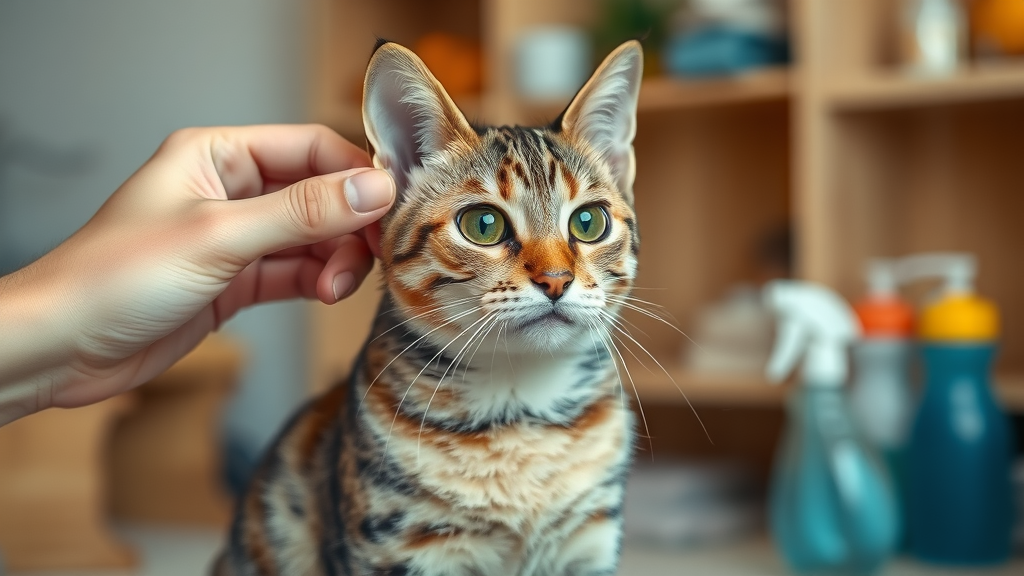
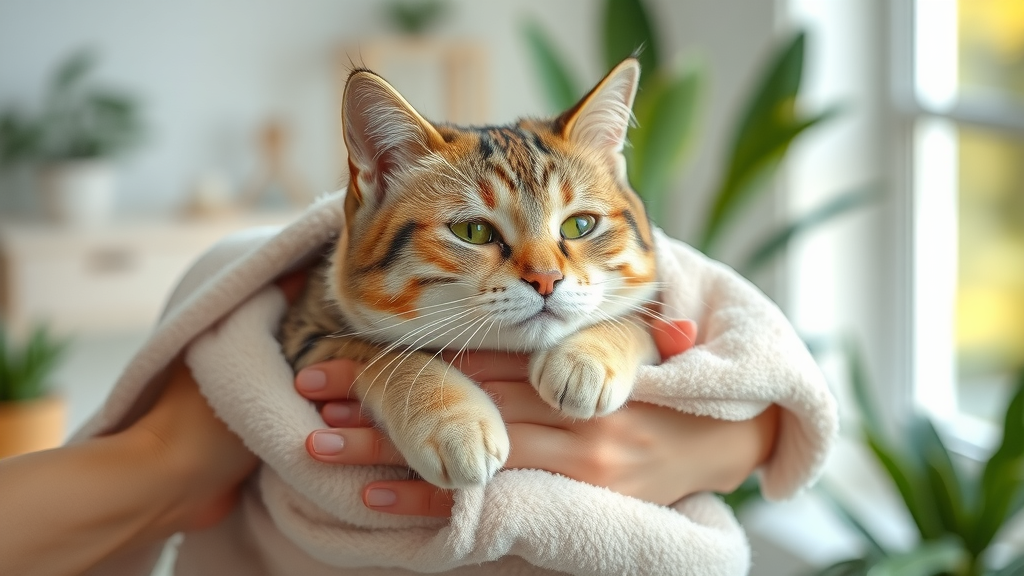
How to Safely Hold Your Cat During Ear Cleaning
Many cats dislike having their ears cleaned , so knowing how to gently restrain your pet is key. To keep things calm, wrap your cat in a towel, leaving only their head exposed—this method not only secures your feline but also keeps them feeling safe. If your cat is especially wiggly, ask a friend to hold your cat while you clean to minimize stress or accidental scratches.
- Wrap in a towel for gentle restraint
- Ask for assistance if needed
- Remain calm and offer treats
Speak gently throughout and have treats ready as a reward after each step. If your cat is frightened, take breaks and never force the process—your aim is a positive experience that makes future cleanings easier.
Step-by-Step Guide: How Do I Clean My Cat’s Ears Without Stress
Proper technique matters when cleaning your cat’s ears . Rushing or using the wrong tools can hurt your pet—or even push debris further into the ear canal. Follow this simple, safe step-by-step guide to keep your cat’s ears healthy and your kitty comfortable, minimizing the risk of ear infections, wax buildup, or injury.
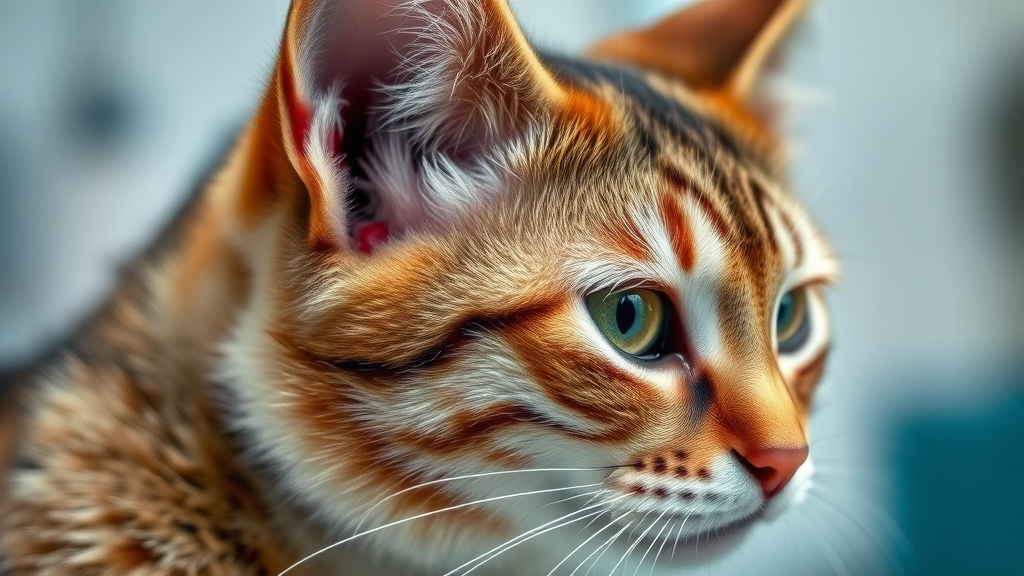
Inspecting Cat Ears and Identifying Dirty Ears or Ear Mites
Start by gently flipping back each ear flap and examining the inside. Healthy cat ears should be pale pink, free of odor, and have no visible wax buildup. If you see dirt, brown or black debris, or redness, these are likely signs of dirty ears, ear mites, or infection—and signal it’s time to clean their ears or consult your vet.
- Look for brown gunk, black debris, or redness
- Observe for ear mite symptoms
Ear mites often look like coffee grounds and may cause intense itching or irritation. If you find these signs, a gentle cleaning may help, but persistent issues mean it’s time for a veterinary appointment to address ear mite or ear infection risks.
Cleaning Your Cat’s Ears Using Approved Ear Cleaner and Cotton Swab Alternatives
To clean their ears , soak a soft cotton pad, ball, or sterile gauze in your ear cleaning solution . Gently wipe only the visible parts of the ear, never inserting anything down the ear canal. Cotton swabs should be avoided—the risk of injury or pushing debris deeper is high. Instead, use pet-safe alternatives that allow you to gently wipe away surface debris while protecting the delicate ear structure.
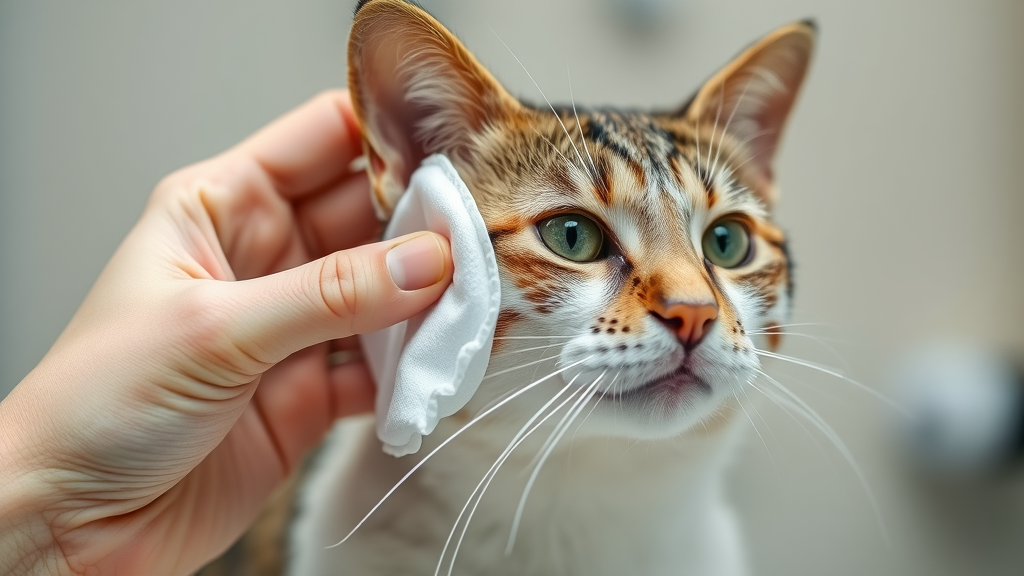
Repeat with a fresh pad for each ear, ensuring you never cross-contaminate. This gentle approach to ear cleaning prevents infections and keeps cat ear irritations to a minimum. Take your time, and if your pet pulls away, offer soothing words or a treat before resuming.
Why Never Use Hydrogen Peroxide or Cotton Swabs Directly in Cat Ear Cleaning
Never use hydrogen peroxide in your cat’s ears . While sometimes suggested as a disinfectant, hydrogen peroxide can burn sensitive ear tissues, leading to pain, inflammation, or lasting damage. Similarly, cotton swabs can push debris further into the ear canal or even puncture the delicate eardrum.
It's always best to stick to soft cotton balls or pads with a vet-approved ear cleaner . This keeps ear cleaning effective without adding unnecessary risks to your cat's sensitive cat ear structures. Always consult with your veterinarian if you're unsure which solution to use.
Step 1: Applying Ear Cleaner — Dos and Don’ts
Fill a cotton pad or gauze with the ear cleaning solution , then gently wipe the inside of the cat’s ear flap and entrance of the canal. Never pour or squirt solution directly into the ear unless you are following professional advice, as this can cause distress and drive debris deeper. Don’t forget to check the bottle for dosage and frequency.
Avoid over-wetting, pressing hard, or scrubbing, as these can irritate the ear flap and canal linings. Your aim should be to loosen and remove visible wax gently, never to clean the ear until it's spotless—over-cleaning strips away natural barriers and can cause further issues.
Step 2: Gently Massage and Encourage Cat to Shake Their Head
After applying the cleaner, massage the base of the ear with your fingers for about 10–20 seconds. This helps the cleaning solution break up wax or debris deep inside the ear canal . Once you’ve done this, let your cat shake their head—this action naturally brings softened dirt and wax to the outer ear where you can safely wipe it away.
Don’t be alarmed by vigorous head shaking. It’s perfectly normal and a healthy way for your cat to expel loosened debris. Be ready for some drops of cleaner or wax to escape and always protect nearby soft furnishings!
Step 3: Wipe Away Excess and Leave Ears Clean
Finally, use a clean cotton pad or ball to gently wipe away any remaining solution and loosened debris from the cat ear flap or ear entrance. Never dig inside, as this can cause injury. A pet safe reward or treat finishes the job and turns ear cleaning into a positive experience for your cat.
Inspect your cat’s ears one more time—if you still notice odor, redness, or discharge, it’s a signal for a vet visit. Consistent, gentle cleaning ensures your cat’s ears stay healthy, comfortable, and free from infection or irritation.
When to Seek Veterinary Help: Signs Cat Ear Cleaning Isn’t Enough
Sometimes, cleaning your cat’s ears at home isn’t sufficient—especially if you observe symptoms that don’t resolve with gentle cleaning. Persisting problems may require specialized treatments or medication from your veterinarian. Watch your cat closely and trust your instincts; early intervention prevents serious cat ear infections and health complications.
If you’re unsure about any signs or notice escalating discomfort, always consult your vet rather than trying to treat severe issues at home.
Recognizing Symptoms of Ear Mites, Infections, and Health Conditions
Beyond standard dirt or wax, some symptoms point toward more serious conditions such as ear mites, ear infection , or allergic reactions. Persistent shaking, continued scratching after cleaning, or a foul odor usually means a deeper problem. Be alert to changes in your cat’s behavior or appearance of the ear canal .
- Persistent odor
- Excessive discharge
- Unusual behaviors
Don’t wait if these symptoms don’t resolve or worsen after ear cleaning. Veterinary assessment is always the safest next step , as untreated infections or ear mites can lead to chronic pain or hearing loss.
Essential Tips and Common Mistakes in How Do I Clean My Cat’s Ears at Home
Many well-meaning pet parents make mistakes during cat ear cleaning that could harm their feline friends. To ensure the process remains stress-free and safe, keep these essential tips in mind.
Never over-clean; cats’ ears are sensitive, and too much cleaning can trigger infections or skin problems. Always use products and tools intended for pets, and stop immediately if your cat displays signs of pain or distress. And finally, make regular but not excessive ear checks a part of your weekly grooming ritual—prevention is always easier than a cure!
Maintaining Regular Ear Cleaning Without Overdoing It
For most cats, weekly ear checks are plenty. Only clean ears when you detect dirt, wax buildup, or a hint of odor. Overdoing it can upset your cat’s natural ear defenses, leading to irritation or even ear infections . Every pet is different—breeds with folded ears or those prone to wax may need more frequent checks than others.
- Inspect once per week
- Clean only when necessary
Watch for any behavior changes before or during ear cleanings —persistent resistance or sudden signs of pain are a red flag. In these cases, consult your vet for guidance before continuing future cleanings.
Why Professional Cat Ear Cleaning May Be Required
Professional help is sometimes the best way to manage recurrent ear infections , persistent dirt, or impacted debris you can’t remove at home. Veterinary cleaning is gentle, thorough, and uses specialized tools designed for sensitive feline ears.
Your vet may recommend professional cleaning for kittens, senior cats, or felines with complex inner ear structures. They can also identify and treat causes like ear mites , bacteria, or allergies that aren’t resolved by home cleaning.
| Product Type | Safe for Cats? | Usage Instructions | Notes |
|---|---|---|---|
| Saline Solution | Yes | Rinse only | Vet approved |
| Hydrogen Peroxide | No | Do not use | May irritate |
| Vet-Approved Ear Cleaner | Yes | As directed | Safest option |
Ready to follow along step-by-step? Our visual guide brings expert ear cleaning tips to life, covering everything from gentle restraint to using the right cleaning solution—no more guesswork, only safe, trusted techniques.
Step-by-step instructional video showing safe cat ear cleaning, including close-ups of supplies and gentle techniques, with vet-approved tips and real cat demonstration.
People Also Ask: Your Top Cat Ear Cleaning Questions Answered
What can I clean my cat's ears with at home?
- Use only vet-approved ear cleaning solutions
- Avoid using alcohol, vinegar, or hydrogen peroxide
- Soft gauze, cotton pads (not swabs) are safest
"Simple saline or specially formulated ear cleaners are usually best—check with your vet first."
Only products expressly safe for cats should go in or near the cat ear . Homemade solutions can be risky, so ask your vet for a recommendation before trying anything new. Cotton balls or pads are ideal; avoid Q-tips or anything small that can push debris deeper or harm the ear canal .
How to get rid of brown gunk in cat ears?
- Gently loosen debris with a vet-approved cleaner
- Never dig deeply with cotton swabs
- Clean as recommended by your vet
Brown gunk is often a sign of wax buildup or ear mites . Use a soft, cleaner-soaked pad to gently wipe visible dirt. Persistent dark debris may indicate infection or mites; in these cases, prompt professional guidance is safest for your cat.
What is the black stuff in my cat's ears?
- Could indicate ear mites, infection, or fungal issue
- Contact your vet for an assessment
Black or coffee ground-like debris is a classic sign of ear mites , but can also point to ear infection or a less common fungal problem. Always get a vet to examine these symptoms for an accurate diagnosis—especially if combined with scratching, odor, or swelling.
Can I use hydrogen peroxide to clean out my cat's ears?
- No, hydrogen peroxide can irritate and damage ear tissue
- Always use a solution approved for cats
Hydrogen peroxide can be harsh and cause painful irritation inside your cat’s sensitive ear canal . Skip this solution entirely—your vet will suggest safer, gentler options like saline or a specific ear cleaning solution .
Sometimes even the best intentions can lead to mistakes when cleaning your cat’s ears. Watch our quick video on common don’ts, like using cotton swabs, household chemicals, or over-cleaning, and learn simple ways to make your ear care routine safe and positive.
Highlights include real cat demonstrations, expert tips, and proven techniques for keeping ear cleaning gentle and effective.
Frequently Asked Questions About How Do I Clean My Cat’s Ears?
- How often should I clean my cat’s ears? – Inspect weekly; only clean as needed unless your cat’s vet suggests otherwise.
- What are safe ear cleaning alternatives? – Use saline or vet-approved products; avoid home remedies unless cleared by your vet.
- How can I calm my cat before cleaning? – Gentle handling, treats, and slow movements create a positive experience.
- What are signs of an allergy following ear cleaning? – Look out for swelling, redness, itching, or new sensitivities after using a cleaner.
Final Thoughts and Recommendations on How Do I Clean My Cat’s Ears?
- Always consult with your veterinarian
- Use only vet-approved solutions
- Monitor your cat for changes after ear cleaning
"Proactive ear care can catch problems early and keep your feline friend healthy and happy." — Veterinary Health Alliance
Join Thousands of Pet Lovers: Sign Up for Trusted Cat Ear Cleaning Tips and Care News
Want expert advice, trending products, and must-know health tips for your pet? 📬 Join our free monthly newsletter — made for pet lovers, by pet lovers. Stay ahead on all things cat care, from ear cleaning solutions to the latest wellness updates, and join a community passionate about their pets.
For comprehensive guidance on cleaning your cat’s ears, consider the following resources:
-
“Instructions for Ear Cleaning and Administering Ear Medication in Cats” by VCA Animal Hospitals provides a detailed, step-by-step approach to safely clean your cat’s ears, emphasizing the importance of using appropriate cleaning solutions and techniques. ( vcahospitals.com )
-
“How to Clean and Medicate Your Cat’s Ears” by Vetstreet offers insights into recognizing signs that your cat’s ears may need cleaning and outlines safe methods to do so, including when to seek veterinary assistance. ( vetstreet.com )
These resources offer expert advice to ensure your cat’s ear cleaning routine is both safe and effective.

Write A Comment