Add Row
Add Element
Paw Press News
update

cropper
update
Add Element
  • Home
  • Categories
    • Training
    • Health
    • Nutrition
    • Behavior
    • Grooming
    • Gear
    • Toys
    • Lifestyle
    • Travel
    • Adoption
    • Stories
October 20.2025
1 Minute Read

How Do I Trim My Cat’s Nails Safely? Expert Tips Inside

Have you ever wondered if you could confidently trim your cat’s nails at home—without a scratch, stress, or fear? Many pet parents just accept scratches and stress as part of the process, but it doesn’t have to be that way. This easy-to-follow guide will answer the question, how do I trim my cat’s nails safely, and give you expert secrets for a happier, healthier cat (and less nervous nail trims for you!).

Curious About How Do I Trim My Cat’s Nails Safely? Let’s Challenge What You Think

When it comes to trimming your cat’s nails, most people are more nervous than their feline friends. You might assume that only a professional can handle cat nail care without drama, or that clipping will always end badly. In truth, with the right technique, the right tools, and a bit of feline psychology, trimming cat nails can be a safe and calm experience for both of you.

Many cat parents believe that their pet won’t tolerate having their paws handled, but the secret is in the preparation and patience. By learning to handle your pet’s paws gently and taking things slow, you can make nail trims a normal part of your routine. In just a few minutes, you’ll discover how to avoid the dreaded “quick” (the pink part that causes pain and bleed if cut), choose the best nail clippers for cats, immobilize your furry friend without triggering stress, and reward your cat for a job well done. Let's break down outdated cat grooming myths and replace them with trusted, vet-approved strategies.

“Many pet owners worry about nail trim accidents, but with the right approach, nail trimming can be safe and stress-free for both you and your cat.” – Dr. Emily Carter, DVM

What You’ll Learn About How Do I Trim My Cat’s Nails Safely

  • Best practices for cat nail trimming at home
  • Preventing injuries like cutting the quick
  • How to immobilize a cat for nail trimming
  • Choosing the right tools for safe nail trims
  • Rewarding your cat to create positive experiences

Close-up of a healthy cat paw and nails, showing calm curiosity—cat nail image for how do I trim my cat’s nails safely, with gentle, natural cat fur texture and movement, in a softly lit living room.

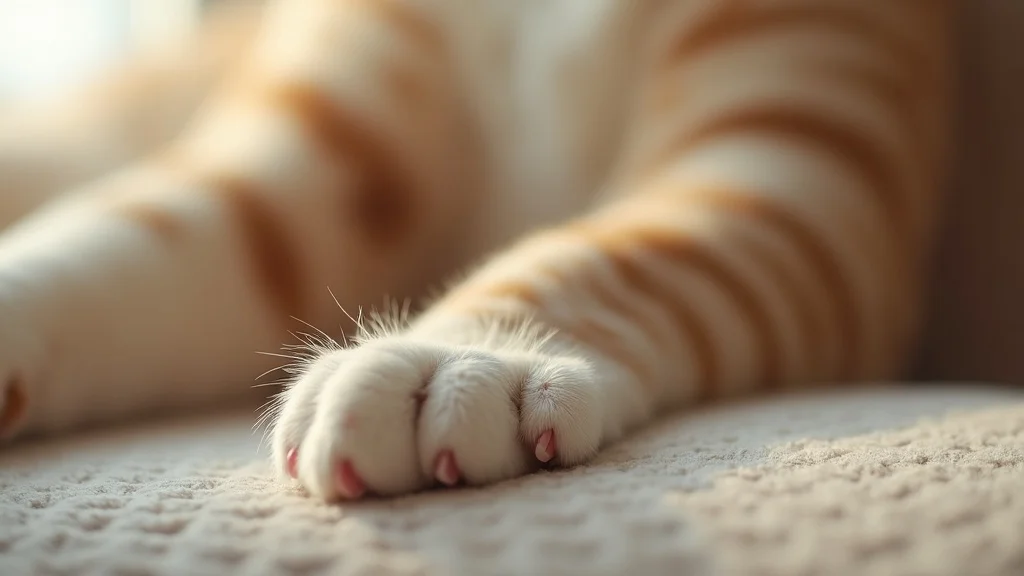
Understanding Cat Nails: Anatomy and Growth Patterns

Your cat’s paws are built for climbing, scratching, and play—so understanding what’s happening beneath the fur is key to safe trims. A cat nail is not like a human nail. It’s curved, with a hard, outer shell protecting a soft, sensitive core called the quick. The quick is a pink part you might see through lighter-colored nails; it contains blood vessels and nerves. Cats have retractable claws, and on each paw, they have five nails on the front (including the dewclaw) and usually four on each back paw. The front claws typically need trimming more often because they’re less likely to wear down naturally. Knowing the difference between nail tip and quick helps you avoid pain and bleed during trims—making the whole experience more positive for both you and your pet.

Nail health isn’t just about avoiding scratches; it’s an important part of maintaining your cat’s wellbeing. Nail trims prevent snagging on carpets and reduce the risk of painful ingrown or broken claws, which are common in older cats or inactive felines. If you regularly see your cat’s nails sticking to soft furnishings, or if you hear clicks on the floor, it’s time for a trim. Understanding this anatomy and growth pattern will empower you to confidently keep your cat comfortable—and your furniture safe!

Why Cat Nail Care Matters for Your Feline's Wellbeing

Trimming your cat's nails regularly is an essential part of their health routine. Neglected claws can curl and embed into the paw pad, causing pain and possible infection. Overgrown claws also increase the risk of accidental scratches to both humans and other pets. This routine grooming helps maintain your cat’s agility, prevents joint stress, and reduces unwanted scratching behaviors. So, while it may feel daunting at first, learning to trim the tip of your cat’s nails is a loving act of care—one that enhances their comfort and strengthens your bond!

Veterinarians universally agree that maintaining short, healthy cat nails leads to fewer injuries and less anxiety for cats. Making nail trimming part of your cat care ritual also introduces opportunities for extra petting, treats, and positive attention. And when your cat isn’t stressed, you both win: your cat enjoys life comfortably, and you enjoy fewer scratches on your hands and sofa.

Cat Nail Growth Cycles and Common Problems

Cats’ nails grow at different speeds, with older cats often experiencing thicker, brittle claws. Outdoor cats may naturally wear their nails down through climbing and scratching trees, while indoor cats need trims every 2-4 weeks. Watch for signs such as nails protruding when their paw is relaxed or clicking against floors—these are clues it’s time for a trim. If left untrimmed, claws can become ingrown, leading to infection or limping. Another common issue is splitting: dry seasonal air or improper trimming can cause cracks.

Be mindful of behavioral clues—if your cat is biting or over-grooming their paws, it could indicate discomfort from their nails. Pay close attention to the dewclaw (the “thumb” claw) as it doesn’t contact the floor and is more likely to become overgrown. The more you observe your cat’s nail growth cycle and catch problems early, the easier it’ll be to keep their paws healthy and pain-free.

How Do I Trim My Cat’s Nails Safely: Setting Up for a Successful Nail Trimming Session

Preparation is the secret to a successful, smooth cat nail trimming session. Start by setting aside a quiet, well-lit area where your cat feels comfortable and secure. This could be your living room or a sun-drenched kitchen table. Gather your supplies ahead of time: nail clippers designed for cats, styptic powder in case you accidentally cut the quick, a soft towel, and some of your cat’s favorite treats. Ensure you won’t be interrupted, as patience and calm are essential to help your cat relax.

Many cats need to become accustomed to having their paws handled. Make a habit of gently touching your cat’s feet during cuddles, offering a treat when they allow you to hold their paw. This “paw training” lays the foundation for stress-free trims. Once your cat is used to the feeling, sett the mood: play calming music, keep sudden movements minimal, and have someone else available if you need help to gently hold your cat. Being prepared makes the experience easier and safer for everyone involved.

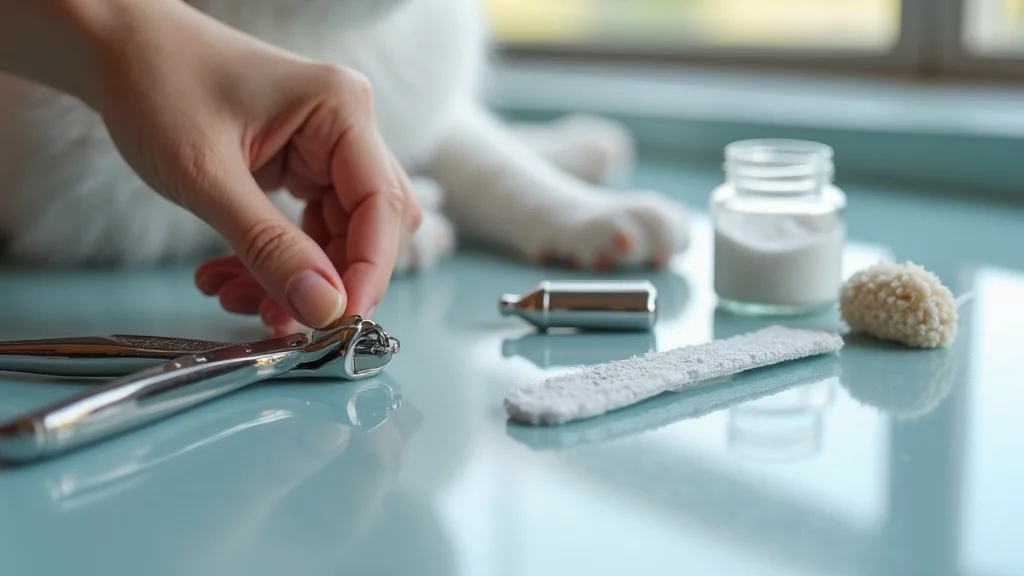
Choosing the Best Tools for Cat Nail Trimming

The right equipment makes all the difference in how do I trim my cat’s nails safely. Nail clippers designed for cats are preferred over human nail clippers because they’re shaped to accommodate the curve of a cat nail and often feature a safety guard to avoid cutting the quick. Scissor-style or guillotine-style clippers are both effective when kept clean and sharp; dull blades can crush the nail rather than making a quick, clean cut. Always keep styptic powder nearby—this stops the bleeding instantly if the quick is nicked. A small nail file can smooth jagged edges, ensuring your cat doesn’t snag nails after trimming.

Inspect your tools before each session. Cleanliness is essential to prevent infection—wipe clippers with alcohol and dry thoroughly. Keep supplies organized in a handy caddy or dedicated drawer so you’ll never have to scramble mid-trim. Taking the time to choose and maintain the best nail trimming gear leads to faster, safer, and more comfortable nail care sessions for your cat.

Photorealistic set of organized cat nail trimming tools for safe cat nail trims—cat nail clippers, styptic powder, and nail file neatly arranged and ready to use on a tabletop.

Creating a Calm Environment Before Nail Trim

Your cat’s emotional state is crucial for a smooth nail trim. Begin by choosing a time when your pet is naturally relaxed—after a meal or heavy play session works well for many cats. Speak in calm, gentle tones and offer reassuring pets. You may want to let your cat investigate the trimming tools ahead of time, so they’re less intimidating. Drape a soft towel over your lap and avoid any sudden movements as you handle your cat’s paws.

If your cat is particularly nervous, consider using feline pheromone sprays or diffusers in the area to create a sense of safety. For cats who resist restraint, gently wrapping them in a blanket—leaving one paw exposed at a time—can help. Consistency is key: the more calm, positive experiences your cat has with nail trims, the less anxiety they’ll feel in the future. Set yourself up for success by focusing on your cat’s comfort as much as the clipping itself.

Step-by-Step Guide: How Do I Trim My Cat’s Nails Safely at Home

  1. Gently handle your cat’s paws to get them used to touch.
  2. Expose the nail by pressing the pad to extend the nail outward.
  3. Identify the quick—look for the pink part, and avoid cutting the quick.
  4. Use clean, sharp trimmers for safety. Position the clipper perpendicular to the nail.
  5. Trim only the pointed tip of each nail. Never clip near or into the quick.
  6. Reward your cat with treats and praise after every successful nail trim.

Photorealistic scene of a safe, gentle cat nail trimming at home—person steadying the cat’s paw and clipping a nail, demonstrating how to trim your cat’s nails safely in a cozy, well-lit room.

Nail Trim Safety: How to Avoid Cutting the Quick

The biggest concern most cat parents have during a nail trim is accidentally cutting the quick—the pink, sensitive part of the nail containing nerves and a blood vessel. Slicing into the quick will cause your cat pain and bleed, leading to fear of future trims and potential infection. For cats with light-colored nails, the quick is usually easy to spot. For those with dark nails, only trim small amounts at a time and watch for a chalky white ring, which signals you’re close to the quick.

Always make several small, careful cuts rather than a major snip. The safe zone is the clear, hooked tip of the nail—trimming just this part reduces the risk of injury. Brighter lighting and a slow pace are your best tools for avoiding cutting the quick. If you’re unsure, trim less rather than more; you can repeat the process more frequently, but you can’t undo a painful cut. A calm approach and vigilant observation are the foundation of safe cat nail care.

How to Spot the Quick in Cat Nails and Why It’s Important

Spotting the quick is vital for painless nail trims. Hold your cat’s paw pad gently and extend the nail. In clear or white nails, you’ll see a pink core (the quick) inside the nail—keep blades far from this area. With dark or black nails, shine a small flashlight underneath to reveal the rough boundary of the quick. Always avoid cutting the quick, as it contains sensitive nerves and blood vessels; cutting here will make your cat anxious about future trims and may require first aid.

If you can’t tell where the quick ends, err on the side of safety. Even professional groomers sometimes trim less to make sure they don’t cause pain. Your cat will thank you for your caution! As you become more experienced, you’ll develop an eye for the perfect spot to trim the tip safely and easily.

Macro close-up of a cat nail showing the translucent quick—vivid detail of nail anatomy for identifying the quick and avoiding it during cat nail trims.

First Aid Tips: What to Do If You Accidentally Cut the Quick

If you accidentally cut the quick and cause bleeding, stay calm. Immediately dip the nail into styptic powder (or gently press a styptic pencil to the nail) to stop the bleeding. If you don’t have styptic products, firmly press a clean tissue or gauze to the nail until bleeding ceases. Keep your cat calm and prevent them from licking the wound, as this can delay healing. Most quick nicks heal quickly if treated promptly, but monitor for signs of infection (redness, swelling, or prolonged bleeding) and contact your vet if you’re concerned.

Don’t scold or panic—reassure your cat, offer a treat, and take a break before trying again. Accidents happen, even to the pros. The key is to minimize stress and turn it into a learning experience. This will help your cat remain willing to participate in future nail trims.

Pro Tips: Immoblizing Your Cat for Nail Trimming Without Stress

Immobilizing your cat safely is crucial for a smooth nail trim. The goal is to gently hold your cat still without causing fear or resentment. For most cats, wrapping them snugly in a towel (the “kitty burrito technique”) with one paw exposed is highly effective. This keeps both you and your feline safe, reducing the chance of sudden jerks or scratches. For particularly energetic cats, enlist a helper to gently hold the cat, using calm, reassuring hands on the shoulders or back to keep your pet steady but secure.

If your cat is especially nervous, try positive associations. Drape your cat in a soft towel during cuddle time, and offer treats when they stay calm. Over time, this helps reduce negative reactions when the towel appears for grooming. Practice makes perfect: regular, non-trimming handling helps cats get used to having their paws handled and associating these moments with affection, not apprehension.

Techniques for Calming and Immobilizing Cats Safely

A soft voice, gentle touch, and steady pace do wonders for calming cats before a nail trim. The towel wrap technique (kitty burrito) is a staple among veterinarians and groomers. Place your cat on a towel, fold it snugly around the body with only one limb exposed, and continue to speak softly as you hold the cat. Light, even pressure reduces anxiety and helps avoid startling your pet. If your cat becomes upset, take a break and try again later—never force the issue.

Other calming aids include pheromone sprays or diffusers in the grooming area, as well as familiar objects like your cat’s favorite blanket. It’s crucial to build trust: regular, low-stress paw handling sessions (even without actual trimming) make each future nail trim easier and less intimidating for your feline friend.

Photorealistic image of a calm cat wrapped in a soft towel on a person’s lap—demonstrates safe immobilization for cat nail trimming, with a relaxed feline and gentle environment.

When to Ask a Professional for Help with Nail Trimming

If your attempts at home are consistently met with fear, aggression, or if you find it impossible to avoid cutting the quick, don’t hesitate to contact a professional groomer or veterinary clinic. Some cats, especially older cats with health conditions, may need sedation or specialized handling for safe trims. Don’t struggle alone—your vet can demonstrate techniques, recommend better tools, or even clip your cat’s nails for you. The goal is always a stress-free, pain-free experience for your feline, so prioritize safety and comfort above all.

Seeking professional help also makes sense if you notice signs of infection, injury, or abnormal nail growth. A skilled pro can tackle tough cases and offer tips tailored to your unique kitty, helping you build confidence for future at-home trims.

Reward Your Cat: Making Nail Trimming a Positive Experience

Transforming your cat’s nail trim from a feared event into a positive one hinges on rewarding your cat. After each successful step—whether it’s letting you hold the paw, a single nail trimmed, or a finished manicure—shower your cat with treats, extra petting, and praise. This positive reinforcement builds trust, teaching your feline that good things happen when their nails are trimmed.

Use high-value treats your cat doesn’t get at other times and praise in a cheerful voice. Consistency is key: over time, your cat may even look forward to grooming sessions! Think of these moments as a chance to bond, not just a chore to power through. With patience and lots of positive reinforcement, nail trims can become a routine part of your cat’s life—minus the drama.

Treats and Praise: Reinforcing Good Nail Trim Behavior

The phrase reward your cat isn’t just about giving a treat—it’s about making the entire process enjoyable. After trimming each nail (or even after just handling the paws calmly), offer small bits of a favorite food, a head scratch, or a few minutes with a beloved toy. Immediate rewards help your cat make the connection between nail trims and positive experiences. If you skip this step or only reward after the full trim, you may miss out on reinforcing the right behavior.

Tailor your rewards to your cat’s preferences—some cats like food, some prefer cuddles. For exceptionally nervous cats, even a break and a change in scenery can be a reward. Steady encouragement and positive experiences are crucial for how do I trim my cat’s nails safely, making you both look forward to next time.

Joyful cat receiving treats after a safe nail trim—illustrating how to reward your cat for good nail trimming behavior with treats and affectionate praise.

Tools and Gear: Best Nail Clippers, Styptics, and More

Tool Features Recommended Use
Cat nail clippers Curved blades, safety guard Home trims
Styptic powder Stops bleeding Quick nicks
Nail files Finishing touch Smooths edges

How Often Should You Trim Your Cat’s Nails for Optimal Health?

The right trimming schedule depends on your cat’s lifestyle and age. On average, most indoor cats benefit from nail trims every 2–4 weeks. Outdoor cats, who naturally wear down their nails, may need less frequent care, but it’s still important to check regularly. Kittens and young cats may need more frequent nail trims as they adjust to home environments, while older cats with less activity benefit from consistent maintenance to prevent overgrowth.

Observing your cat’s nails and routine behavior is the best indicator. If nails are snagging on carpets, clicking on hard floors, or if you notice your cat biting or licking their paws, it’s time for a trim. Clipping regularly not only prevents injuries but helps your cat become comfortable with the process—which is key to long-term health and happiness.

Guidelines for Indoor vs. Outdoor Cats

Indoor cats are more likely to require regular trims since scratching posts and soft furnishings usually aren’t enough to keep their nails short. Aim for every 2–4 weeks, checking both front and back paws. In contrast, outdoor cats who frequently climb and scratch may naturally keep their nails at the right length—but monitor them for splits, cracks, or signs of embedded claws, especially in older cats.

Remember, even if your cat is mostly outdoors, annual or semi-annual vet check-ups should include a quick nail inspection to spot potential problems early.

Signs Your Cat Needs a Nail Trimming

Look for clear cues: nails visible when your cat’s paw is resting, clicking sounds on hard surfaces, or your cat getting stuck on blankets. If you see any curved or thickened nails, especially on the dewclaw, it’s time for a trim. Excessive paw licking, biting, or limping can be signs of discomfort caused by overgrown claws. Proactive care prevents bigger, more painful issues down the road.

Stay alert to changes in walking, hiding paws, or hesitance to jump or play—these may indicate nail pain. With regular attention, you’ll keep your cat well-groomed and happy, while enjoying less scratched furniture as a bonus!

This video shows a veterinarian guiding you through each step, including how to hold the cat’s paw, spot the quick, and reward your cat after a successful trim. Seeing the process in action builds your confidence—so hit play before your next grooming session!

People Also Ask: How to Trim a Cat's Nails That Won't Let You?

Answer: How to Trim a Cat's Nails That Won't Let You

If your cat refuses to allow nail trims, start by gradually desensitizing them—gently handle their paws daily, offer treats, and praise calm behavior. Use a towel wrap to immobilize your cat if needed, keeping one paw exposed at a time. Break the process into small steps: trim one or two nails per session and stop if your cat becomes anxious. Don’t force the issue; instead, make each interaction short and positive. If all else fails, consider enlisting a helper or your veterinarian for guidance and support.

People Also Ask: Are You Supposed to Trim Indoor Cat's Nails?

Answer: Are You Supposed to Trim Indoor Cat's Nails

Yes, indoor cats rely on nail trims to keep their claws comfortable and prevent overgrowth. Unlike outdoor cats, they lack natural surfaces that wear nails down, making regular trimming vital. Keeping your indoor cat’s nails short protects your furniture and ensures your pet is pain-free. Make nail trimming as routine as brushing or feeding, starting when your cat is a kitten if possible for easiest results.

People Also Ask: How to Immobilize a Cat for Nail Trimming?

Answer: How to Immobilize a Cat for Nail Trimming

To safely immobilize a cat, use a towel wrap (“kitty burrito”) with just one paw exposed for trimming. Hold your cat gently but securely in your lap, using even, gentle pressure. Enlist a helper if needed to support your cat’s body, keeping movement to a minimum. Always prioritize your cat’s emotional comfort and stop if they become distressed—forced restraint can foster fear of future trims.

People Also Ask: How Do I Trim My Cat's Nails at Home?

Answer: How Do I Trim My Cat's Nails at Home

Start by familiarizing your cat with paw handling, then use a well-lit area and sharp nail clippers designed for cats. Press the paw pad to extend the nail, identify the quick, and clip just the pointed tip. Trim a few nails at a time, giving praise and treats for good behavior. If nervous, wrap your cat in a towel, and never hesitate to pause and finish later. Patience, practice, and positive reinforcement will make home nail trims easier with each session.

Frequently Asked Questions About How Do I Trim My Cat’s Nails Safely

  • What if my cat fiercely resists nail trimming? – Try desensitizing your cat to paw handling slowly and use high-value treats. If your cat remains fear-aggressive, consult your veterinarian for specialized approaches or professional grooming help.
  • Can I use human nail clippers for my cat? – Human nail clippers can crush or split cat nails. It’s best to use clippers specifically designed for cats—they offer better control and safety features to avoid cutting the quick.
  • How do I recognize nail trim anxiety in my feline? – Signs include panting, hiding, vocalizing, swatting, or aggressive grooming of the paws. Stop, offer comfort, and resume the process later. Positive associations are key to reducing anxiety.
  • What’s the best age to start trimming my kitten’s nails? – You can begin handling and gently trimming a kitten’s nails as early as 6–8 weeks. Early and positive experiences foster a lifetime of easy nail care.

Key Takeaways: How Do I Trim My Cat’s Nails Safely

  • Patience and gentle restraint are crucial to how do I trim my cat’s nails safely
  • Always avoid cutting the quick to minimize pain and injury
  • Positive reinforcement, such as rewarding your cat, encourages cooperation
  • Regular nail trims protect both you and your feline from accidental scratches

Stay Updated on Pet Care: Subscribe to PawPress for More Tips

Want more tips, stories, and pet care guides delivered straight to your inbox? Join our monthly PawPress newsletter and stay in the loop with the latest for your furry friends. 🐾 Subscribe now — your pets will thank you!

To enhance your understanding of safely trimming your cat’s nails, consider exploring the following resources:

  • “How To Cut Cat Nails”: This comprehensive guide from PetMD offers step-by-step instructions on holding your cat, exposing the nail, and making precise cuts to avoid the quick. (petmd.com)

  • “How to Trim a Cat’s Nails”: VCA Animal Hospitals provides detailed advice on selecting appropriate nail clippers, safely restraining your cat, and techniques to minimize stress during the trimming process. (vcahospitals.com)

These resources offer expert insights and practical tips to ensure a safe and stress-free nail trimming experience for both you and your feline companion.

Grooming

3 Views

0 Comments

Write A Comment

*
*
Related Posts All Posts
11.06.2025

The Ultimate Guide to Selecting Safe Nail Clippers for Your Dog

Update Understanding the Importance of Safe Nail Trimming As a responsible dog owner, you want to ensure your pet's comfort and safety. Regular nail trimming is a crucial part of dog care, but it can also be a daunting task. Choosing the right nail clippers for your dog significantly impacts their grooming experience. This article explores the best types of nail clippers tailored to your dog’s unique needs, from size to temperament. Selecting the Right Nail Clippers for Your Dog Dogs come in all shapes and sizes, so it’s essential to choose clippers that suit your pet's specific breed. Various styles exist, including guillotine, scissor-type, and nail grinders, each catering to different nail conditions and owner preferences. Guillotine Clippers: Ideal for smaller dogs under 30 pounds, guillotine clippers provide precise control. Brands like Resco and Adniac offer models that are sharp and easy to handle, making them fantastic for delicate paws. These clippers are designed to slide the nail through a small hole before cutting, minimizing the chance of accidental injuries. Scissor-Type Clippers: Larger dogs with thicker nails typically benefit from scissor-type clippers. Professional groomers often prefer models by Millers Forge and Andis, known for their stainless steel blades and ergonomic designs. These clippers enable strong cuts and lessen the fatigue on the groomer's hands, making long grooming sessions manageable. Nail Grinders: For those nervous about clipping, grinders can be a gentle alternative. Tools like the Dremel PawControl allow gradual nail shortening, which can be especially beneficial for dogs with darker nails where the quick is not visible. Grinders reduce the risk of cutting too close and create a smoother edge, making them a worthwhile investment for many pet owners. Prioritizing Safety Features in Nail Clippers While choosing nail clippers, safety should be your top priority. Look for these crucial features: Non-Slip Handles: Ergonomic grips prevent slippage during use, reducing the chances of accidental injuries to both your dog and yourself. Safety Guards: Many clippers now come with built-in safety guards that protect against over-cutting, ensuring you don’t accidentally clip the quick—a painful experience for your dog. Sharp Blades: Quality stainless steel blades are crucial for clean cuts. Dull blades can splinter nails, causing discomfort and stress. Exploring Recent Trends in Dog Nail Care The pet grooming industry is evolving, with new tools and innovations being introduced regularly. The rise of high-tech grooming products, such as nail clippers equipped with LED lights, offers enhanced visibility when trimming, especially for dogs with black nails. This simple addition can help ensure a safer and more pleasant grooming experience. Practical Tips for a Positive Nail Trimming Experience Nail trimming can be a positive experience if approached correctly. Here are some tips: Start early: Introducing grooming habits to puppies can help them become accustomed to nail trimming as a normal part of their routine. Be patient: If your dog is anxious or scared, take your time and acclimate them to the clippers gradually. Use treats: Positive reinforcement can go a long way in creating a calm environment. Reward your dog after every successful cut. Final Thoughts on Dog Nail Trimmers Choosing the right nail clippers is essential for the well-being of your dog. Investing in high-quality clippers that suit your dog's size and temperament, along with incorporating safety features, will ensure a safer and smoother grooming process for both you and your pet. Keep your dog’s nails comfortably short and their paws happy! If you're considering new clippers, remember to look for options that feature the elements we've discussed. Your dog’s comfort is paramount, and the right tools can make an invaluable difference in their grooming routine.

10.22.2025

What Grooming Tools Should I Have at Home for My Cat? Must-Haves!

Did you know that over 80% of cats develop grooming-related health issues before age 10 if proper tools aren't used at home? This startling fact highlights just how crucial the right grooming tools are in keeping your cat healthy, comfortable, and happy in their own home. Whether you’re new to cat parenting or aiming to level up your pet grooming skills, knowing what grooming tools should I have at home for my cat can make the difference between playful purring and unnecessary vet visits. Startling Facts: Why Cat Grooming Deserves More Attention at Home “Did you know that over 80% of cats develop grooming-related health issues before age 10 if proper tools aren’t used at home?” Most cat owners assume their felines' obsessive self-licking means they’re already perfectly groomed. However, veterinarians and professional groomers agree that domestic cats, like their dog grooming counterparts, often need extra help—especially with today’s indoor lifestyles and a variety of coat types that trap loose fur and natural oils. Regular grooming not only keeps your cat’s coat soft and reduces loose hair around your home, but also prevents painful matted fur, skin irritations, and even certain illnesses. The right grooming tools are the front line in stopping these issues before they start. Investing in quality cat grooming tools designed for cats can be the difference between a healthy, happy pet and a costly trip to the vet. What You'll Learn: The Essentials of Cat Grooming Tools for Every Home The must-have grooming tools for your cat's well-being How each grooming tool is used for optimal pet grooming at home Special considerations for different coat types and cat personalities Vet-backed insights for safe and effective at-home grooming Pet Grooming Basics: Understanding Your Cat's Unique Needs Why Cat Grooming Tools Matter for Feline Health and Comfort While cats spend hours self-grooming, your intervention with the right grooming tools is essential for their long-term comfort and wellbeing. Cats with dense or long fur struggle to remove loose hair, leading to painful mats and clumps. The accumulation of dead fur can also interfere with the distribution of natural oils and cause skin problems for your furry friend. Even short-haired cats benefit from regular pet grooming to remove loose fur, minimize hairballs, and maintain healthy skin. Modern cat grooming tools, like the slicker brush and deshedding grooming tool, are specifically designed for cats, allowing you to gently work through tough tangles or remove loose hair without causing discomfort. Supplying your home grooming kit with these essential instruments not only reduces allergies and shedding but also fosters bonding and trust with your cat. In other words, regular cat grooming with the right tools equals a happier, healthier feline—and a cleaner home for you. How Coat Type Impacts Selection of Cat Grooming Tools Choosing what grooming tools should I have at home for my cat isn’t a one-size-fits-all answer. Your cat’s coat type—whether short-haired, long-haired, or double-coated—directly shapes the tools you’ll need. For example, long-haired breeds require grooming tool combinations to tackle mats, remove loose fur, and prevent tangles, while short-haired cats may need less frequent but still regular brushing to keep their coat shiny and healthy. Double-coated cats have a soft undercoat that can trap dirt and loose hair, so specialized deshedding tools work best for maintaining their plush, healthy coats. Understanding the unique needs of your cat’s coat ensures you select the most effective grooming gloves, brushes, combs, and other essentials. Remember: using the wrong grooming tools can cause discomfort, miss loose fur, or even damage your cat’s delicate skin, making knowledge and tool selection vital. Comparison of Cat Coat Types and Suggested Grooming Tools Cat Coat Type Main Grooming Tool(s) Best For Frequency Short-Haired Slicker brush, grooming glove Removing loose fur, reducing shedding 1–2x per week Long-Haired Wide-tooth comb, deshedding tool Preventing tangles & mats 3–4x per week Double-Coated Deshedding tool, slicker brush Removing undercoat, preventing buildup 2–3x per week What Grooming Tools Should I Have at Home for My Cat? Your Essential Checklist Building your cat grooming kit means matching the right tools to your pet's specific needs. Here are the essentials every cat owner should have at home to cover every aspect of regular grooming sessions and feline care: Slicker brush Wide-tooth comb Deshedding grooming tool Grooming glove Fine-tooth flea comb Cat-specific nail clippers Styptic powder (for accidental nicks during nail trim) Cat-friendly shampoo & wipes (like waterless shampoo for sensitive skin) Each grooming tool is specifically designed to address a particular aspect of pet grooming. For instance, a slicker brush excels at removing loose fur and dirt, while a deshedding tool targets shedding undercoats, especially in spring and fall. Don’t forget hygiene basics—nail clippers control cat nail length and shape, while flea combs and cleaning wipes keep your cat free from parasites and debris. Slicker Brush: The Foundation of Every Cat Grooming Arsenal No grooming kit is complete without a versatile slicker brush. This pet grooming tool features fine, curved bristles, specially made to penetrate your cat’s coat without scratching their sensitive skin. Its main job? To remove loose hair, tangles, and debris that self-grooming simply can’t handle. For cats prone to hairballs or mats, a high-quality slicker brush is a game-changer for both your cat’s appearance and comfort. The slicker brush stands out because it fits a range of coat types and is easy for most owners to use. Whether your feline has thick or fine hair, this brush helps maintain their natural oils and ensures loose hair ends up in the trash, not your favorite sweater. Consistent pet grooming with the slicker brush keeps grooming sessions short, sweet, and stress-free for both you and your cat—plus, it makes cleaning the slicker brush quick and easy with proper technique. Slicker Brush vs. Grooming Glove: Which Cat Grooming Tool Is Better? Both slicker brushes and grooming gloves can remove loose fur, but they shine in different situations. Slicker brushes are ideal for cats with medium to long fur, particularly if you’re dealing with tangles, mild mats, or a thicker undercoat. They provide a deeper clean and help distribute the cat’s own natural oils, leaving the coat glossy and healthy. In contrast, grooming gloves are a fantastic choice for cats that dislike traditional brushes. These gloves have flexible, silicone-tipped fingers that mimic petting—making grooming sessions feel like soothing, everyday affection. They work especially well for short-haired cats, kittens, or felines with grooming anxiety. Both grooming tools have a place in your kit, so try them to discover which fits your cat’s needs and personality best. How to Use a Slicker Brush for Effective Grooming Using a slicker brush correctly is a skill—and can make grooming stress-free for you and your cat. Start with gentle strokes, following the direction your cat’s fur grows. Focus on common trouble spots such as behind the ears, under the legs, and along the back, where loose fur and dirt tend to build up. If you encounter a small tangle, work through it slowly with short, light movements rather than pulling, which can hurt your cat’s sensitive skin. For best results, brush your cat in a quiet, familiar environment and reward them with treats before and after the grooming session. Regular brushing (at least once a week) prevents mats and reduces hairballs. Don’t forget to clean your slicker brush after each use to remove trapped fur and keep the bristles in top condition—making each grooming session more effective and enjoyable. Combs and Grooming Tools for Tackling Tangles and Mats Even if you brush your cat regularly, tangles and mats can still occur—especially with long-haired or double-coated kitties. To keep your cat’s coat smooth and pain-free, supplement your grooming arsenal with the right combs and deshedding tools. These grooming tools are specifically designed to glide through stubborn knots, remove loose fur, and safely detangle matted fur without tugging or hurting your cat. Consistent use of wide-tooth and fine-tooth combs gives you an extra edge in daily pet grooming and can spot trouble areas early, before mats become unmanageable. For severe tangles or matted fur that won’t budge, consult a professional groomer—forcing a comb can hurt your furry friend. Choosing Between a Wide-Tooth Comb and Fine-Tooth Comb Wide-tooth combs are best for starting your grooming session with long-haired or thick-coated cats. Their spaced prongs gently separate fur strands and help remove loose hair and dirt without pulling or breaking delicate hairs. Once you’ve detangled the major knots, switch to a fine-tooth comb for a finishing pass—these can catch smaller tangles and any remaining debris. Fine-tooth flea combs serve double duty by picking up fleas, eggs, and other pests as they move through your cat’s coat, making them an important addition to your grooming toolkit, especially during warmer months. Regular combing does more than just beautify; it gives you a chance to examine your cat’s skin and fur for unusual lumps, rashes, or parasites you might otherwise miss. Deshedding Tools for Long-Haired and Double-Coated Cats If you have a Maine Coon, Persian, or another long-haired or double-coated breed, investing in a quality deshedding tool is crucial. These specialized grooming tools are built to reach and remove loose undercoat fur, dramatically reducing the risk of matted fur and decreasing how much loose hair your cat leaves around the house. The stainless steel teeth of a deshedding tool are specifically designed for cats, ensuring gentle but thorough results without damaging the topcoat. Use the deshedding tool a few times a week during your cat’s peak shedding periods (usually in spring and fall) and less often the rest of the year. Always follow the manufacturer’s instructions to avoid over-brushing, and never use dog grooming deshedders on cats—they’re shaped differently and can cause irritation. If mats have already formed, consult a professional groomer for safe removal rather than trying to hack away at them yourself. Grooming Gloves: A Gentle Solution for Sensitive Cats How Grooming Gloves Work and When to Use Them Grooming gloves are a uniquely gentle pet grooming tool, especially for cats who cringe at the sight of a brush. Designed with soft, flexible nubs on the palm, these gloves let you “pet” your cat while lifting loose fur and debris, creating a more relaxing grooming session. Sensitive, anxious, or elderly cats often respond best to grooming gloves—associating the tool with snuggling rather than stress. Grooming gloves can be safely used on all coat types and are exceptional for regular maintenance and introducing kittens to cat grooming. They make grooming enjoyable for cats who dislike other tools, while keeping your hands clean and fur-free. Try using a grooming glove two or three times per week, or daily during shedding season, and you’ll notice a softer, shinier coat and fewer hairballs. Expert Tip: Integrating Grooming Gloves into Your Cat's Routine To help your cat accept grooming gloves, start by letting them sniff and explore the glove while giving treats and praise. Begin with short “petting” strokes on favorite spots like the head or neck, gradually working toward more sensitive areas. Make grooming part of playtime or cuddle sessions to build positive associations. Over time, your cat will look forward to the gentle attention, making your regular grooming routine a true bonding experience. Remember, even with grooming gloves, always watch your cat’s body language for signs of discomfort, and don’t force the session if your feline friend walks away. With patience and a calm approach, grooming gloves can turn what grooming tools should I have at home for my cat from a question into a relaxing, rewarding ritual. Cat Nail Clippers & Care: Keeping Claws Healthy at Home Types of Cat Nail Clippers: Which Grooming Tool Is Best? Proper cat nail care is crucial to prevent splintering, snagging, and injury to your pet—or your furniture! There are several types of cat nail clippers available: scissor-style (great for thick nails), guillotine-style (easy for beginners), and electric grinders (for smoothing rough edges). Each is designed to provide a safe, precise nail trim, ensuring your cat stays comfortable and healthy. The best nail clippers are chosen based on your comfort and your cat’s temperament. Go for clippers with non-slip handles, sharp stainless steel blades, and safety guards to avoid cutting too close. Remember to keep some styptic powder nearby in case of minor nicks, and never use nail clippers designed for dogs or humans—these won’t provide the control or precision needed for sensitive cat nails. How to Trim Your Cat's Nails Safely and When to Seek a Professional Groomer Trimming your cat’s nails may seem daunting, but with the right grooming tool and some patience, it’s a simple at-home task. Start by gently handling your cat’s paws during cuddle time to get them comfortable. When ready to trim, press gently on each toe to extend the claw, and snip the sharp tip—avoiding the pink “quick” where nerves and blood vessels run. Always clip in a well-lit, quiet space and offer lots of praise and treats. If your cat wriggles, hides, or has dark nails where it’s hard to spot the quick, consider enlisting a professional groomer or your veterinarian. Keeping up with regular nail trims every 2–4 weeks prevents overgrowth and helps protect furniture and family from accidental scratches. Flea Combs, Ear Cleaners, and Specialty Cat Grooming Tools Protecting Your Cat with Flea Combs and Safe Ear Cleaning Regular use of a fine-tooth flea comb is key in the battle against fleas, eggs, and skin debris, especially for cats allowed outdoors, but also indoor pets during peak flea seasons. Carefully comb through your cat’s fur, starting at the head and moving down the body, focusing behind the ears and at the base of the tail—common hiding spots for pests. After each stroke, wipe the comb with a damp tissue to remove any finding. Ear cleaners and specialty cat grooming tools like waterless shampoos and gentle wipes can be essential for cats prone to wax buildup, allergies, or sensitive skin. Always use products specifically designed for cats and check with your vet about recommended cleaning schedules. Never use cotton swabs, which can push debris deeper or risk ear damage. If your cat’s ears look red, dirty, or smell bad, a professional groomer or veterinary visit is needed to rule out infections. When Should You Turn to Professional Groomers? “Every cat can benefit from a well-stocked grooming toolkit at home, but there’s no shame in calling a professional groomer for stubborn mats or complex care.” — Dr. Lisa Martin, DVM Even with all the right cat grooming tools, there are times when it’s safest and kindest to ask for professional help. Cats with chronic mats, behavioral issues, mobility problems, or complicated coats will benefit from the expertise of a professional groomer. Don’t risk injury to your cat—or yourself—by forcing tough grooming sessions at home. Your pet will thank you for the extra care, and you’ll have peace of mind knowing their health is in good hands. FAQs About What Grooming Tools Should I Have at Home for My Cat What grooming tools do cats need? Cats need slicker brushes, combs, grooming gloves, nail clippers, and flea combs as the basic grooming tools for their at-home care. Adding deshedding tools, cat-friendly wipes, and ear cleaners ensures complete, head-to-paw grooming attention. How do I groom my cat at home? Start with gentle brushing using the appropriate grooming tool for their coat type, follow with nail trims, and check for fleas and ear debris regularly. Make grooming sessions short, positive, and reward your cat with treats and cuddles for cooperation. Do vets recommend cat steam brushes? Most veterinarians suggest traditional grooming tools over steam brushes for everyday cat grooming, unless dealing with severe matting or shedding issues. Steam brushes can be helpful when used by an experienced hand, but are not usually necessary for regular pet grooming routines. Can I trim my indoor cat's hair? Yes, you can trim your cat's hair if necessary—especially for hygienic reasons or to remove mats—but seek guidance from a professional groomer for safety, as cats have delicate skin and specific grooming needs compared to other pets. Key Takeaways: Building a Home Cat Grooming Kit Evaluate your cat's unique coat type and personality Match grooming tools to each grooming need: brush, comb, trim, clean Don't hesitate to consult with a professional groomer for complex cases Consistency makes all the difference in cat grooming and overall health For More Cat Grooming Tools and Tips: Subscribe to PawPress Want more tips, stories, and pet care guides delivered straight to your inbox? Join our monthly PawPress newsletter and stay in the loop with the latest for your furry friends. 🐾 Subscribe now — your pets will thank you! To ensure your cat’s health and comfort, it’s essential to have the right grooming tools at home. Regular grooming not only maintains a clean and healthy coat but also strengthens the bond between you and your feline friend. Essential Grooming Tools for Your Cat: Slicker Brush: Ideal for removing loose fur and preventing mats, especially in long-haired breeds. (petscathouse.com) Pin Brush: Suitable for cats with longer, thicker coats, a pin brush helps detangle knots and distribute natural oils for a shiny coat. (pawfills.com) Nail Clippers: Regular trimming prevents overgrown nails, which can cause discomfort or injury. (mydailypaws.com) Fine-Toothed Comb: Useful for detecting and removing fleas, flea eggs, and debris from your cat’s coat. (cattowatto.com) Grooming Gloves: Perfect for cats that dislike traditional brushes, grooming gloves allow you to remove loose fur while petting your cat. (mydailypaws.com) Cat-Specific Shampoo and Wipes: Occasional baths with cat-friendly shampoo and the use of grooming wipes help maintain skin health and cleanliness. (mydailypaws.com) Ear and Eye Cleaning Supplies: Regular cleaning of your cat’s ears and eyes prevents infections and maintains overall health. (mydailypaws.com) Deshedding Tool: Particularly beneficial for cats that shed heavily, deshedding tools help remove loose undercoat fur, reducing shedding and hairballs. (petscathouse.com) By incorporating these tools into your regular grooming routine, you can ensure your cat remains healthy, comfortable, and happy.

10.22.2025

How Often Should I Brush My Dog's Fur? Expert Tips

Have you ever looked at your pup’s fluffy coat and wondered, “Am I brushing enough—or too much?” If so, you’re not alone! Many pet parents are surprised at how much impact the right brushing schedule has on their dog’s comfort, health, and even happiness. In this comprehensive guide, we’ll unlock the secrets behind how often you should brush your dog’s fur, break down advice by breed and coat type, and offer simple routines to make your best friend’s coat shine—all based on expert insights and real-life results. The science behind regular brushing and your dog’s well-being How to select the right brush for different coat types Step-by-step guide for a professional grooming routine at home Expert insights on frequency, technique, and best practices for brushing your dog’s fur Unlocking the Secrets: How Often Should I Brush My Dog's Fur? When it comes to how often should I brush my dog’s fur, there isn’t a one-size-fits-all answer. Your dog’s grooming needs depend on their specific coat type, activity level, and even their lifestyle. While all dogs benefit from some level of regular brushing, the frequency for each pup may vary from once a week for short-haired dogs to almost daily sessions for breeds with long or thick coats. Why is brushing your dog so important? Routine grooming controls loose fur, reduces shedding, spreads natural oils for healthy, shiny fur, and prevents mats that can lead to discomfort and skin irritation. Brush your dog too little, and you risk tangles, hotspots, and even trouble finding ticks or other issues. But brush the right way, and it’s a bonding ritual that supports your dog’s health and happiness. Whether you’re prepping your Beagle for a stroll, taming a Poodle’s fluffy curls, or smoothing a Golden Retriever’s plush coat, a good grooming routine starts with understanding your pup’s needs—and we’re here to help you do just that! Why the Question ‘How Often Should I Brush My Dog’s Fur’ Is More Important Than You Think People often assume grooming is about looks alone, but the real benefits run much deeper. First, regular brushing helps distribute those healthy natural oils throughout your dog's coat—keeping it soft, shiny, and strong. But perhaps more importantly, brushing removes loose hair and loose fur that would otherwise wind up on your furniture or be swallowed by your pet, sometimes leading to uncomfortable hairballs (yes—dogs get them too, not just haired cats!). Mats, knots, or tangles can trap moisture, sweat, and dirt close to your dog’s skin, leading to skin irritation or even serious infections if ignored. Beyond coat health, a solid grooming routine provides time for important check-ins. As you brush your dog, you’ll spot lumps, bumps, flea dirt, or even thorny burrs hiding in their fur. Think of it as your own mini at-home health assessment! And, of course, for many dogs, the attention and gentle touch are benefits themselves—turning what some pet parents dread into a treat for your furry friend. That's why focusing on how often should I brush my dog’s fur isn’t trivial—it's central to being a caring, proactive pet owner. Brush Your Dog: Understanding Fur Types and Brushing Needs To set up an effective grooming routine, it’s critical to look at your dog’s coat type. Is your furry friend a low-shedding short-haired breed, a curly-haired Poodle, or a double-coated Retriever? Understanding the structure and needs of your dog’s fur will help you choose the right brush or comb, and answer the key question—how often should I brush my dog’s fur for optimal results? Different coat types require different care, and the right tools can make all the difference for coat health and comfort. Take note: brushing your dog isn’t just about the dog breed but the coat they wear. Some mixed-breed dogs may inherit multiple coat qualities. Always observe your own pup to determine what works best. Regular brushing reduces the risk of matting, ensures even spread of natural oils, and minimizes skin irritation. Even for short-haired dogs who rarely tangle, a weekly quick brush does wonders for shedding and overall fur shine. The frequency for grooming sessions naturally ramps up for double-coated or long-haired pups who experience more matting and debris. Short-Haired Dog vs. Long-Haired Dog: How Often Should I Brush My Dog's Fur? Short-haired dogs, like Beagles or Boxers, generally require less frequent brushing—sometimes as little as once or twice a week. However, these regular appointments still help rid the coat of loose hair and distribute skin oils evenly for a healthy shine. Use a rubber curry brush or a slicker brush to remove hair without irritating your dog’s skin. On the other hand, long-haired dogs, like Golden Retrievers, Afghan Hounds, or even some haired cats, may benefit from brushing their coats three to five times a week to avoid tangles and mats that come from their longer fur. The bigger the coat, the more work it takes. Long-haired and curly breeds are more prone to knots, and may require daily brushing during heavy shedding seasons or after outdoor play. For these furry friends, a pin brush, slicker brush, or specialized de-matting comb will ensure knots don’t have a chance to form. Remember—when in doubt, focus on gentle, thorough grooming, and check for mats after every walk in the park! Brushing Frequency Guide By Dog Coat Type Coat Type Frequency per Week Recommended Brush Type Short-Haired 1–2 times Rubber/Slicker Brush Long-Haired 3–5 times Pin/Slicker/De-matting Comb Double-Coated 2–4 times Rake/Undercoat Tool Curly/Wavy-Coated 2–3 times Slicker/Pin Brush The Role of Breed and Lifestyle in a Grooming Routine Dog breeds and their everyday activities play a large part in determining how often you should brush your dog’s fur. Active dogs who love to frolic outdoors often pick up more dirt, twigs, and debris, raising their brushing needs. For high-energy breeds like Golden Retrievers or working breeds with undercoats, several weekly sessions are a must—especially during shedding season. Conversely, couch-loving pups or breeds with short, closely cropped coats, such as Beagles, might do well with basic weekly maintenance. Of course, lifestyle choices (indoor vs. outdoor play, swimming, and seasonal changes) affect grooming needs, too. Some dog breeds actually require daily brushing to keep their coat in top shape, especially curly and double-coated types prone to matting. No matter which breed you have, watch for changes in fur condition—dullness or tangles may signal a need to increase your grooming sessions or try professional grooming advice. Match brushing habits to your dog’s energy, outdoor play, age, and any unique needs their breed may require. How Regular Brushing Impacts Your Dog’s Health and Well-Being Consistent brushing routines do much more than keep your pet looking cute. Regular brushing helps prevent mats, reduce shedding, and improve skin health for dogs of all coat types. Think of brushing as your dog’s regular spa treatment—gentle strokes not only remove loose hair and debris but also stimulate circulation for healthier skin. For haired dogs, mats can quickly turn into painful problems if left unchecked, leading to discomfort that few pet parents notice until a professional groomer appointment becomes necessary. Dogs that get brushed regularly are also far less likely to encounter issues like skin irritation, hotspots, or bacterial infections that can fester under tangled fur. Each gentle sweep removes dust, loose fur, pollen, and even environmental allergens. For pet parents who want to stay on top of their furry friend’s health, routine brushing is just as important as nail trimming, dog shampoo baths, or routine visits to the veterinary clinic. Adopt grooming sessions as a regular part of life, and you'll quickly notice a brighter, happier pup. Brushing Your Dog to Prevent Mats, Reduce Shedding, and Improve Skin Health "Regular brushing is about much more than looks—it’s key to your dog’s comfort and long-term health." — Certified Professional Groomer It’s easy to underestimate how quickly a dog’s fur can go from manageable to matted. Mats are not just unsightly—they tug painfully at the skin and may hide parasites, sores, or irritation. By sticking to a regular grooming routine, especially during your dog's designated shedding seasons, you can avoid painful detangling sessions down the line. Regular brushing not only removes loose fur and hair but spreads healing natural oils throughout the coat, giving your dog that healthy, glossy shine every owner dreams of. Brushing sessions also boost your connection with your pup, signaling affection and care. By noticing changes in their coat type or sensitive areas, you can address small problems before they become big ones. Whether you use a bristled brush or a slicker brush, the goal remains the same: maintain even coat health while making grooming a positive experience. A little extra attention now helps you avoid costly, stressful trips to the professional groomer tomorrow! Professional Groom Tips: Signs It's Time to Groom Your Dog How do you know it’s time for a grooming session? Check for visible tangles, mats, or clumps, especially behind your dog’s ears, around the tail, and between the legs. If your hand gets stuck running down their back or you notice more loose hair than usual on their bedding or around the home, a grooming session is overdue. Watch for dullness in the coat, signs of skin irritation, flaking, or your dog scratching and licking more than usual—these are red flags. Professional groomers also recommend establishing a routine before your pup’s coat gets out of hand. For breeds that require daily brushing, such as Collies or Poodles, sticking to a schedule is key. If brushing no longer improves the situation or you spot swollen, red, or open skin patches, it’s time to consult a professional groomer or your veterinary clinic for targeted care. Early attention is always easier and much less stressful for your pup. Professional Groom or DIY? Choosing the Best Grooming Routine Pet parents sometimes wonder if regular home brushing is enough, or if they should book salons with a professional groomer instead. The answer depends on your dog’s breed, coat type, and temperament. Most dogs can thrive with a great at-home brushing schedule, punctuated by professional grooming sessions every 4–8 weeks. But certain breeds—like Poodles, Old English Sheepdogs, or long-coated mixed breeds—benefit from professional expertise to prevent mats or manage complex coats. If your dog is nervous, anxious, or dislikes grooming, you might start with short home sessions to build comfort, then rely on the skill of a pro for the harder jobs (like nail trimming, undercoat rakes, or tricky de-matting). Remember, professional grooming doesn’t just mean shampooing—experts look for subtle health signs and use high-grade tools. But no matter what, a DIY brushing routine between appointments keeps your dog looking and feeling their best. When to Seek a Professional Groomer vs. Home Brushing Your Dog If you’re dealing with heavy mats, stubborn tangles, or a dog who gets anxious with clippers or combs, a professional groomer is your best bet. Pros have the skills and specialized tools—like de-matting combs and grooming sprays—to safely remove knots and leave your dog comfortable and stylish. For home brushing, focus on regular, gentle passes that avoid pulling and take extra time on sensitive spots. Use each session as a health check, keeping an eye out for anything unusual. The ideal schedule combines both: regular at-home brushing, and seasonal or as-needed visits to a reputable professional groomer. Breed and coat type guide the balance—long-haired and double-coated dogs generally need more frequent professional care, while short-haired dogs can go longer between appointments as long as home brushing is consistent. When in doubt, seek advice from your veterinarian or ask a groomer to recommend the best routine for your furry friend. Step-by-Step Guide: How to Brush Your Dog’s Fur for a Professional Groom at Home Want your pup to look like they’ve just strolled out of the salon—every week? With a few simple tools and techniques, you can create a professional grooming experience without ever leaving home. Start with the basics: have your slicker brush, pin brush, undercoat rake, de-matting comb, and a gentle grooming spray on hand. Create a calm, positive environment, use slow, steady movements, and make brushing sessions something your dog looks forward to. You don’t need a high-end grooming table or fancy salon products to make a difference. A little patience, safe handling, and attention to detail will leave your dog feeling relaxed and looking fabulous. Consistency is the secret ingredient—when grooming is part of the daily or weekly routine, your pup’s coat (and overall mood) reflects the care you put in. Slicker brush Pin brush Undercoat rake De-matting comb Grooming spray/mist Techniques for Brushing Your Dog: Avoiding Tangles and Mats Start each brushing session by examining your dog’s coat with your fingers, feeling for any knots or mats. Begin with a pin brush for general detangling, working from head to tail in gentle strokes. Focus on one section at a time—neck, back, sides, belly, then legs—brushing in the direction of hair growth to minimize pulling and discomfort. For problem areas prone to matting (behind ears, under legs, around the tail), switch to a slicker brush or de-matting comb for those tight tangles. Light misting with a grooming spray or a small amount of dog conditioner can help stubborn knots slide loose and protect your dog’s delicate skin. Work patiently and reward your pup with treats, praise, or play during and after grooming sessions. If the brush “snags,” stop and work out tangles gently with your fingers or by sectioning the coat. Avoid over-brushing, which can irritate the skin—two or three thorough passes in each area is enough. Your goal: a smooth coat, an upbeat mood, and zero mats every time. Regular Brushing Best Practices: Frequency, Timing, and Grooming Routine Tips "Consistency is the foundation of an effective grooming routine. Your dog learns to love it when it’s a positive, predictable experience." — AKC Grooming Specialist The best brushing schedule is one you can stick to—make it a habit! For most dogs, aim for at least one brushing session per week; increase to three to five times weekly for long-haired or double-coated breeds. Morning or evening, after a walk or as part of wind-down time, is often ideal for gentle, low-stress grooming. Always use the right tools for your dog’s coat type, and be patient. Keep sessions short and sweet at the start, extending them as your furry friend becomes more comfortable. Building positive associations with the grooming process (snacks, cozy bedding, gentle praise) is key to long-term success, especially for sensitive pups. Finish with a once-over of nail clipping and ear checks so your dog gets used to full-body care. If you encounter tough mats or notice increased shedding despite regular brushing, don’t hesitate to seek professional advice—your dog’s comfort is worth it. Troubleshooting: Common Mistakes When You Brush Your Dog Even well-meaning pet parents make mistakes. Skipping days between brushing can turn minor knots into mats, which might eventually need professional grooming intervention. Another common pitfall is using the wrong tool—using a slicker brush on a delicate short-haired dog, for instance, can cause skin irritation. Remember, each coat type needs a specific brush or comb to avoid discomfort and get the best results. Be careful not to press too hard, as dog skin is thinner and more sensitive than it seems. Focus on those trouble zones that are easy to ignore—behind the ears, near the tail, and around the legs. Consistently missing these can create painful matting. Stay positive, reward often, and always check your technique if brushing becomes a struggle. If in doubt, book a quick session with a professional groomer to learn the best methods in person. Skipping days leading to mats Using the wrong brush for coat type Applying too much pressure on delicate skin Ignoring problem areas (behind ears, tails, legs) People Also Ask: Common Questions Answered Should I brush my dog's hair every day? For most dogs, daily brushing isn’t necessary—unless your dog has a long, thick, or curly coat that tangles quickly. Breeds like Poodles, Collies, or Old English Sheepdogs benefit from daily attention. Otherwise, two to five times a week is plenty for healthy maintenance. Always match the frequency to your dog’s coat type and lifestyle! Do dogs feel better after brushing? Absolutely! Brushing isn’t just cosmetic—gentle, regular grooming removes loose fur, improves coat health, and provides a soothing experience that most dogs learn to enjoy. Many become calmer and happier after a satisfying grooming session, especially if it becomes a positive part of their regular routine. How long should I brush my dog's fur? A typical session should last between five and 15 minutes, depending on your dog’s size, coat length, and comfort level. Focus on thorough, gentle strokes rather than speed. Take breaks if your pup appears restless, and extend sessions as needed for especially thick or tangled coats. How do you know when to stop brushing your dog? You’ll know you’re finished when the brush glides smoothly through all areas of your dog’s coat, and no more loose fur or tangles appear. Watch your dog’s body language—if they remain relaxed and you see healthy, shiny fur, you’re done! If your dog gets restless or irritated, it’s time to stop and try again later. FAQs About How Often Should I Brush My Dog's Fur Can you brush your dog too much? Gentle daily brushing is usually safe, but too much pressure or over-brushing sensitive areas can cause redness or irritation. Match frequency to your dog’s comfort and coat needs. What if my dog dislikes being brushed? Start with short, positive sessions, reward good behavior, and gradually increase time as your dog relaxes. Try using treats or toys to build good associations. When should puppies start a grooming routine? Begin brushing as soon as you bring your puppy home. Early positive experiences make lifelong grooming stress-free. How do weather and seasons affect brushing frequency? Dogs usually shed more during spring and fall—so increase brushing during those times. More frequent grooming also helps remove dirt and allergens after outdoor play in wet or muddy seasons. Key Takeaways: How Often Should I Brush My Dog's Fur Most dogs need brushing at least once a week; coat type may increase frequency The right tools and techniques prevent discomfort and health issues Grooming should be a positive, regular part of your dog’s routine Summary: Crafting the Perfect Grooming Routine for Your Dog A smart grooming routine keeps your pup healthy, comfortable, and looking their very best. Match brushing frequency and tools to your dog’s unique coat, and make sessions fun and rewarding—your furry friend will thank you with a shiny, happy wag! Subscribe for More Expert Pet Care: Stay Updated and Keep Your Dog Looking Great Want more tips, stories, and pet care guides delivered straight to your inbox? Join our monthly PawPress newsletter and stay in the loop with the latest for your furry friends. 🐾 Subscribe now — your pets will thank you! Regular brushing is essential for maintaining your dog’s coat health, preventing matting, and reducing shedding. The optimal brushing frequency depends on your dog’s coat type: Short-haired dogs: Once a week is typically sufficient to remove loose hair and distribute natural oils. (aspca.org) Long-haired dogs: Daily brushing is recommended to prevent tangles and mats. (aspca.org) Curly-haired dogs: Brushing every other day helps manage curls and prevent matting. (blacksheeporganics.com) Double-coated dogs: Brushing 2-3 times a week is necessary, especially during shedding seasons. (blacksheeporganics.com) Regular grooming not only keeps your dog looking their best but also allows you to check for skin issues or parasites. Establishing a consistent brushing routine tailored to your dog’s specific coat type will contribute to their overall health and happiness.

Terms of Service

Privacy Policy

Core Modal Title

Sorry, no results found

You Might Find These Articles Interesting

T
Please Check Your Email
We Will Be Following Up Shortly
*
*
*