Add Row
Add Element
Paw Press News
update

cropper
update
Add Element
  • Home
  • Categories
    • Training
    • Health
    • Nutrition
    • Behavior
    • Grooming
    • Gear
    • Toys
    • Lifestyle
    • Travel
    • Adoption
    • Stories
August 18.2025
1 Minute Read

How do I clean my cat’s ears? Expert Tips Inside

Ever wondered, "How do I clean my cat’s ears safely without causing stress or harm?" If you’re a cat owner, keeping your feline friend’s ears clean can be a surprisingly crucial part of their health. When your cat starts scratching their ears, shaking their head, or you notice a strange odor, you might be facing more than just a dirty cat ear. This guide answers your top questions, shares step-by-step ear cleaning methods, and spotlights common mistakes — making ear care at home simple, safe, and stress-free for both you and your cat.

Curious About How Do I Clean My Cat’s Ears? Safe Cat Ear Cleaning Starts Here

Cleaning your cat’s ears is an important part of their overall grooming routine, but knowing when and how to tackle this can be confusing for pet parents. Maybe you’ve spotted some wax buildup or noticed your cat shaking their head. These signs point toward the need for careful, effective ear cleaning—but did you know improper methods can actually lead to ear infections or damage? How do I clean my cat’s ears? is a question every responsible cat owner should ask, and the answer begins with recognizing when cleaning is necessary and choosing safe techniques.

Cats generally keep their own ears quite clean, but ear mites, wax buildup, or infections can cause dirty ears or discomfort. Before reaching for cotton swabs or home remedies, it’s vital to understand that feline ears are delicate—what works for humans may harm your pet. Safe cat ear cleaning starts with observation, the proper tools, and a gentle approach, especially if your cat is showing unique behaviors linked to uncomfortable ears. This section introduces you to trusted signs, preparation steps, and expert insights for cat ear care at home.

Are You Sure Your Cat’s Ears Need Cleaning? Recognizing Signs of Dirty Cat Ear Issues

Not every cat needs regular ear cleanings, but some signs should put you on alert for cat ear problems or the presence of ear mites . Watch closely for signals that indicate your feline’s ears have become too dirty and require your attention.

  • Excess scratching or head shaking
  • Visible dirt or wax
  • Unusual odor or discharge
  • Redness or swelling

If you notice persistent scratching or your cat’s ear flap looks irritated, these could be early clues of an underlying problem. Cats with ear mites often exhibit intense head shaking or a foul odor coming from the ear canal, while wax buildup may present as visible brown or black debris. Spotting these symptoms early and responding promptly helps prevent infection and keeps your cat’s ears clean—and your cat happy.
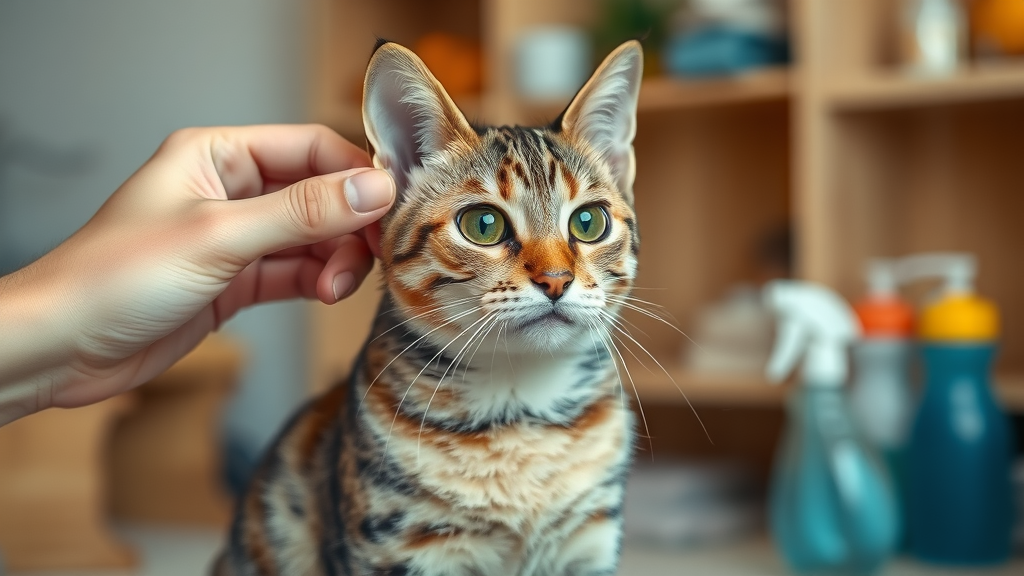
attentive tabby cat with clean ears, curious expression, owner gently inspects cat ear, cat ear cleaning supplies, cat care at home

Preparing for Ear Cleaning: Tools and Environment for Cleaning Your Cat’s Ears at Home

Before starting to clean your cat’s ears at home , it’s essential to gather the right supplies and prepare a calm space. A well-prepared environment ensures ear cleaning is safe and as stress-free as possible—for both you and your pet. The correct ear cleaning solution, cotton balls (or pads) , and treats are your essentials. Consider cleaning your cat’s ears in a quiet room with good light, making it easier to gently inspect and clean without distractions.

Some cats are prone to wax or get dirty ears more often, so setting up everything before you begin will help you act quickly and confidently. Proper preparation protects the sensitive ear canal and makes cleaning your cat’s ears an easy part of their regular care routine. Below are expert-recommended tools and techniques for safe, effective cat ear care at home.

Choosing Ear Cleaner Solutions and Safe Products for Cat Ear Care

Selecting the right ear cleaner is crucial to keeping your cat’s ears healthy. Only use vet-approved ear cleaning solutions specifically made for cats. Avoid anything with alcohol, vinegar, or harsh chemicals—a small amount of commercial saline or a product recommended by your veterinarian is safest. Remember, some solutions intended for dogs or humans can cause irritation in the sensitive lining of the cat ear canal.

"Consult your veterinarian before using any ear cleaner or solution for ear cleaning to avoid potential irritation." — Dr. Emily Foster, DVM

Avoid homemade mixtures unless directly guided by a vet, as improper pH or ingredients can inflame or damage the ear flap and canal. Following your vet’s advice helps prevent infections and keeps ear cleaning gentle, effective, and safe—especially for cats prone to wax or infection.

How to Safely Hold Your Cat During Ear Cleaning

Many cats dislike having their ears cleaned , so knowing how to gently restrain your pet is key. To keep things calm, wrap your cat in a towel, leaving only their head exposed—this method not only secures your feline but also keeps them feeling safe. If your cat is especially wiggly, ask a friend to hold your cat while you clean to minimize stress or accidental scratches.

  • Wrap in a towel for gentle restraint
  • Ask for assistance if needed
  • Remain calm and offer treats

Speak gently throughout and have treats ready as a reward after each step. If your cat is frightened, take breaks and never force the process—your aim is a positive experience that makes future cleanings easier.
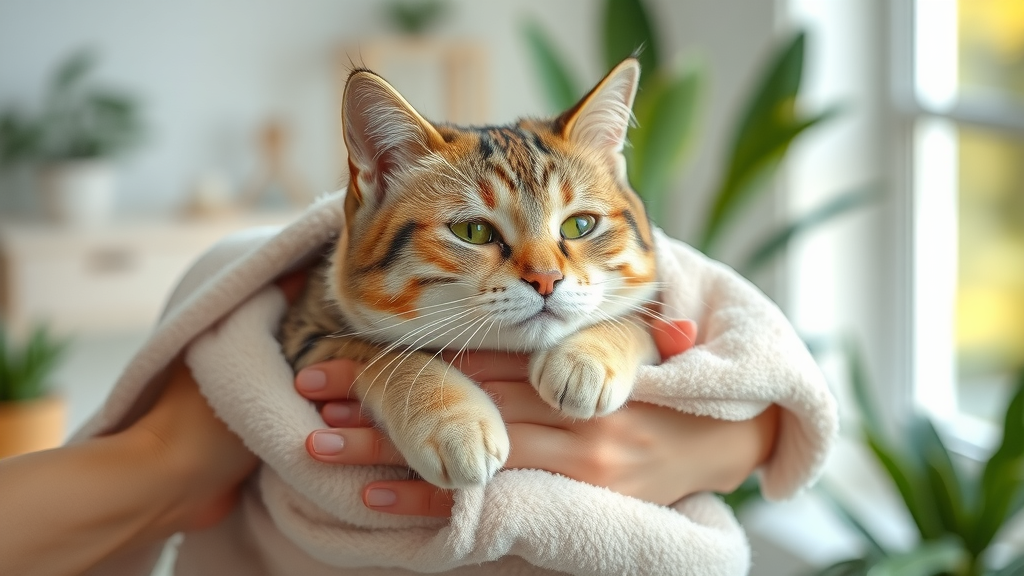
calm domestic shorthair cat wrapped in a towel for ear cleaning, relaxed cat and caring owner, safe cat ear care environment

Step-by-Step Guide: How Do I Clean My Cat’s Ears Without Stress

Proper technique matters when cleaning your cat’s ears . Rushing or using the wrong tools can hurt your pet—or even push debris further into the ear canal. Follow this simple, safe step-by-step guide to keep your cat’s ears healthy and your kitty comfortable, minimizing the risk of ear infections, wax buildup, or injury.

Inspecting Cat Ears and Identifying Dirty Ears or Ear Mites

Start by gently flipping back each ear flap and examining the inside. Healthy cat ears should be pale pink, free of odor, and have no visible wax buildup. If you see dirt, brown or black debris, or redness, these are likely signs of dirty ears, ear mites, or infection—and signal it’s time to clean their ears or consult your vet.

  • Look for brown gunk, black debris, or redness
  • Observe for ear mite symptoms

Ear mites often look like coffee grounds and may cause intense itching or irritation. If you find these signs, a gentle cleaning may help, but persistent issues mean it’s time for a veterinary appointment to address ear mite or ear infection risks.

Cleaning Your Cat’s Ears Using Approved Ear Cleaner and Cotton Swab Alternatives

To clean their ears , soak a soft cotton pad, ball, or sterile gauze in your ear cleaning solution . Gently wipe only the visible parts of the ear, never inserting anything down the ear canal. Cotton swabs should be avoided—the risk of injury or pushing debris deeper is high. Instead, use pet-safe alternatives that allow you to gently wipe away surface debris while protecting the delicate ear structure.
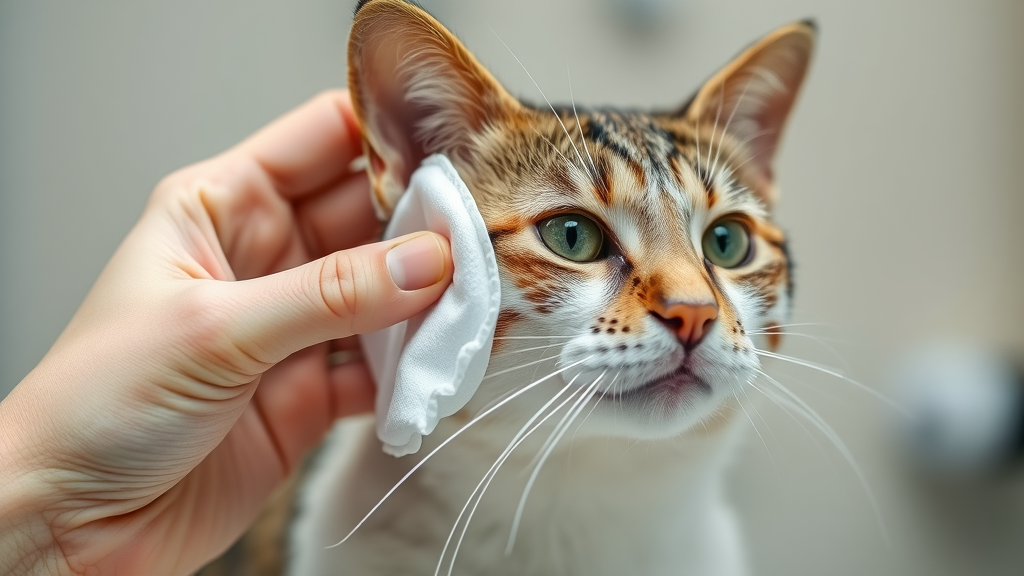
hand using cotton pad to clean cat ear, gentle cat ear cleaning, approved ear cleaner, vet safe method

Repeat with a fresh pad for each ear, ensuring you never cross-contaminate. This gentle approach to ear cleaning prevents infections and keeps cat ear irritations to a minimum. Take your time, and if your pet pulls away, offer soothing words or a treat before resuming.

Why Never Use Hydrogen Peroxide or Cotton Swabs Directly in Cat Ear Cleaning

Never use hydrogen peroxide in your cat’s ears . While sometimes suggested as a disinfectant, hydrogen peroxide can burn sensitive ear tissues, leading to pain, inflammation, or lasting damage. Similarly, cotton swabs can push debris further into the ear canal or even puncture the delicate eardrum.

It's always best to stick to soft cotton balls or pads with a vet-approved ear cleaner . This keeps ear cleaning effective without adding unnecessary risks to your cat's sensitive cat ear structures. Always consult with your veterinarian if you're unsure which solution to use.

Step 1: Applying Ear Cleaner — Dos and Don’ts

Fill a cotton pad or gauze with the ear cleaning solution , then gently wipe the inside of the cat’s ear flap and entrance of the canal. Never pour or squirt solution directly into the ear unless you are following professional advice, as this can cause distress and drive debris deeper. Don’t forget to check the bottle for dosage and frequency.

Avoid over-wetting, pressing hard, or scrubbing, as these can irritate the ear flap and canal linings. Your aim should be to loosen and remove visible wax gently, never to clean the ear until it's spotless—over-cleaning strips away natural barriers and can cause further issues.

Step 2: Gently Massage and Encourage Cat to Shake Their Head

After applying the cleaner, massage the base of the ear with your fingers for about 10–20 seconds. This helps the cleaning solution break up wax or debris deep inside the ear canal . Once you’ve done this, let your cat shake their head—this action naturally brings softened dirt and wax to the outer ear where you can safely wipe it away.

orange tabby cat shaking head after ear cleaning, safe at home cat ear cleaning process

Don’t be alarmed by vigorous head shaking. It’s perfectly normal and a healthy way for your cat to expel loosened debris. Be ready for some drops of cleaner or wax to escape and always protect nearby soft furnishings!

Step 3: Wipe Away Excess and Leave Ears Clean

Finally, use a clean cotton pad or ball to gently wipe away any remaining solution and loosened debris from the cat ear flap or ear entrance. Never dig inside, as this can cause injury. A pet safe reward or treat finishes the job and turns ear cleaning into a positive experience for your cat.

Inspect your cat’s ears one more time—if you still notice odor, redness, or discharge, it’s a signal for a vet visit. Consistent, gentle cleaning ensures your cat’s ears stay healthy, comfortable, and free from infection or irritation.

When to Seek Veterinary Help: Signs Cat Ear Cleaning Isn’t Enough

Sometimes, cleaning your cat’s ears at home isn’t sufficient—especially if you observe symptoms that don’t resolve with gentle cleaning. Persisting problems may require specialized treatments or medication from your veterinarian. Watch your cat closely and trust your instincts; early intervention prevents serious cat ear infections and health complications.

If you’re unsure about any signs or notice escalating discomfort, always consult your vet rather than trying to treat severe issues at home.

Recognizing Symptoms of Ear Mites, Infections, and Health Conditions

Beyond standard dirt or wax, some symptoms point toward more serious conditions such as ear mites, ear infection , or allergic reactions. Persistent shaking, continued scratching after cleaning, or a foul odor usually means a deeper problem. Be alert to changes in your cat’s behavior or appearance of the ear canal .

  • Persistent odor
  • Excessive discharge
  • Unusual behaviors

Don’t wait if these symptoms don’t resolve or worsen after ear cleaning. Veterinary assessment is always the safest next step , as untreated infections or ear mites can lead to chronic pain or hearing loss.
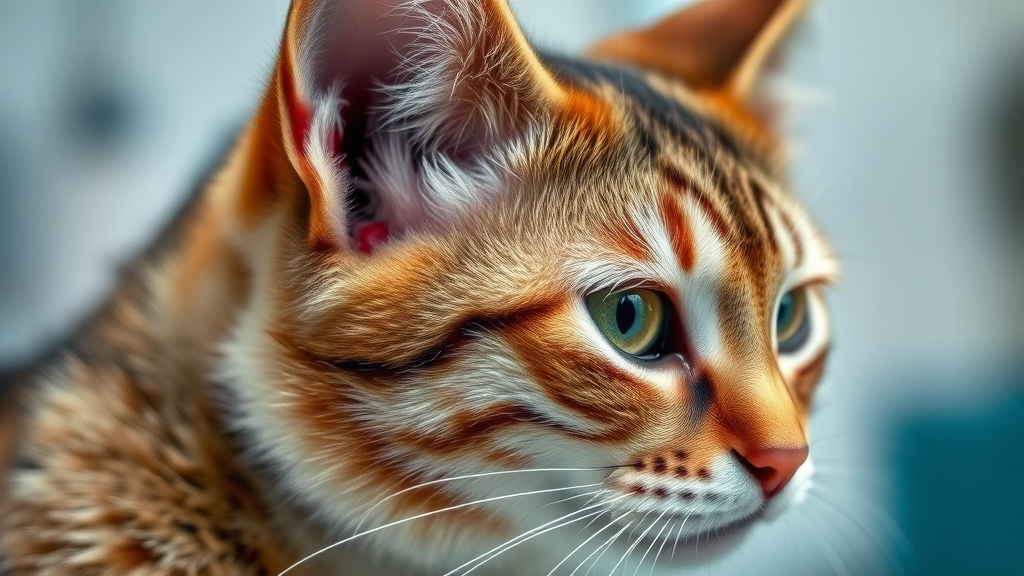
cat with visible ear redness, sign of ear infection, cat ear canal detail, when to visit veterinarian for ear cleaning

Essential Tips and Common Mistakes in How Do I Clean My Cat’s Ears at Home

Many well-meaning pet parents make mistakes during cat ear cleaning that could harm their feline friends. To ensure the process remains stress-free and safe, keep these essential tips in mind.

Never over-clean; cats’ ears are sensitive, and too much cleaning can trigger infections or skin problems. Always use products and tools intended for pets, and stop immediately if your cat displays signs of pain or distress. And finally, make regular but not excessive ear checks a part of your weekly grooming ritual—prevention is always easier than a cure!

Maintaining Regular Ear Cleaning Without Overdoing It

For most cats, weekly ear checks are plenty. Only clean ears when you detect dirt, wax buildup, or a hint of odor. Overdoing it can upset your cat’s natural ear defenses, leading to irritation or even ear infections . Every pet is different—breeds with folded ears or those prone to wax may need more frequent checks than others.

  • Inspect once per week
  • Clean only when necessary

Watch for any behavior changes before or during ear cleanings —persistent resistance or sudden signs of pain are a red flag. In these cases, consult your vet for guidance before continuing future cleanings.

Why Professional Cat Ear Cleaning May Be Required

Professional help is sometimes the best way to manage recurrent ear infections , persistent dirt, or impacted debris you can’t remove at home. Veterinary cleaning is gentle, thorough, and uses specialized tools designed for sensitive feline ears.

Your vet may recommend professional cleaning for kittens, senior cats, or felines with complex inner ear structures. They can also identify and treat causes like ear mites , bacteria, or allergies that aren’t resolved by home cleaning.

Comparison of Home Ear Cleaner Products for Cat Ear Cleaning
Product Type Safe for Cats? Usage Instructions Notes
Saline Solution Yes Rinse only Vet approved
Hydrogen Peroxide No Do not use May irritate
Vet-Approved Ear Cleaner Yes As directed Safest option

Ready to follow along step-by-step? Our visual guide brings expert ear cleaning tips to life, covering everything from gentle restraint to using the right cleaning solution—no more guesswork, only safe, trusted techniques.

Step-by-step instructional video showing safe cat ear cleaning, including close-ups of supplies and gentle techniques, with vet-approved tips and real cat demonstration.

People Also Ask: Your Top Cat Ear Cleaning Questions Answered

What can I clean my cat's ears with at home?

  • Use only vet-approved ear cleaning solutions
  • Avoid using alcohol, vinegar, or hydrogen peroxide
  • Soft gauze, cotton pads (not swabs) are safest
"Simple saline or specially formulated ear cleaners are usually best—check with your vet first."

Only products expressly safe for cats should go in or near the cat ear . Homemade solutions can be risky, so ask your vet for a recommendation before trying anything new. Cotton balls or pads are ideal; avoid Q-tips or anything small that can push debris deeper or harm the ear canal .

How to get rid of brown gunk in cat ears?

  • Gently loosen debris with a vet-approved cleaner
  • Never dig deeply with cotton swabs
  • Clean as recommended by your vet

Brown gunk is often a sign of wax buildup or ear mites . Use a soft, cleaner-soaked pad to gently wipe visible dirt. Persistent dark debris may indicate infection or mites; in these cases, prompt professional guidance is safest for your cat.

What is the black stuff in my cat's ears?

  • Could indicate ear mites, infection, or fungal issue
  • Contact your vet for an assessment

Black or coffee ground-like debris is a classic sign of ear mites , but can also point to ear infection or a less common fungal problem. Always get a vet to examine these symptoms for an accurate diagnosis—especially if combined with scratching, odor, or swelling.

Can I use hydrogen peroxide to clean out my cat's ears?

  • No, hydrogen peroxide can irritate and damage ear tissue
  • Always use a solution approved for cats

Hydrogen peroxide can be harsh and cause painful irritation inside your cat’s sensitive ear canal . Skip this solution entirely—your vet will suggest safer, gentler options like saline or a specific ear cleaning solution .

Sometimes even the best intentions can lead to mistakes when cleaning your cat’s ears. Watch our quick video on common don’ts, like using cotton swabs, household chemicals, or over-cleaning, and learn simple ways to make your ear care routine safe and positive.

Highlights include real cat demonstrations, expert tips, and proven techniques for keeping ear cleaning gentle and effective.

Frequently Asked Questions About How Do I Clean My Cat’s Ears?

  • How often should I clean my cat’s ears? – Inspect weekly; only clean as needed unless your cat’s vet suggests otherwise.
  • What are safe ear cleaning alternatives? – Use saline or vet-approved products; avoid home remedies unless cleared by your vet.
  • How can I calm my cat before cleaning? – Gentle handling, treats, and slow movements create a positive experience.
  • What are signs of an allergy following ear cleaning? – Look out for swelling, redness, itching, or new sensitivities after using a cleaner.

Final Thoughts and Recommendations on How Do I Clean My Cat’s Ears?

  • Always consult with your veterinarian
  • Use only vet-approved solutions
  • Monitor your cat for changes after ear cleaning
"Proactive ear care can catch problems early and keep your feline friend healthy and happy." — Veterinary Health Alliance

Join Thousands of Pet Lovers: Sign Up for Trusted Cat Ear Cleaning Tips and Care News

Want expert advice, trending products, and must-know health tips for your pet? 📬 Join our free monthly newsletter — made for pet lovers, by pet lovers. Stay ahead on all things cat care, from ear cleaning solutions to the latest wellness updates, and join a community passionate about their pets.

For comprehensive guidance on cleaning your cat’s ears, consider the following resources:

  • “Instructions for Ear Cleaning and Administering Ear Medication in Cats” by VCA Animal Hospitals provides a detailed, step-by-step approach to safely clean your cat’s ears, emphasizing the importance of using appropriate cleaning solutions and techniques. ( vcahospitals.com )

  • “How to Clean and Medicate Your Cat’s Ears” by Vetstreet offers insights into recognizing signs that your cat’s ears may need cleaning and outlines safe methods to do so, including when to seek veterinary assistance. ( vetstreet.com )

These resources offer expert advice to ensure your cat’s ear cleaning routine is both safe and effective.

Grooming

0 Views

0 Comments

Write A Comment

*
*
Related Posts All Posts
08.18.2025

What’s the Best Shampoo for Dogs with Sensitive Skin? Find Out Now

Did you know that up to 20% of dogs suffer from sensitive skin — leading to itchy skin, discomfort, and frequent vet visits? Healthy skin for your canine begins at bath time, and your choice of dog shampoo could make all the difference.How to Choose What’s the Best Shampoo for Dogs with Sensitive Skin?When searching for what’s the best shampoo for dogs with sensitive skin, you’re not just picking a bottle from the shelf—you're making a crucial choice for your best friend’s comfort. Most dogs with sensitive skin need gentle products to avoid flare-ups of itchy skin, skin irritation, or hot spots. The ingredients list is your first clue: stick to natural ingredients like colloidal oat and aloe vera or hypoallergenic formulas that reduce the risk of skin issues.Medicated dog shampoos may be recommended for specific skin conditions or skin infections. However, for routine use, focus on shampoos that skip parabens, sulfates, and artificial fragrances. These harsh chemicals may strip away natural oils and damage your dog’s sensitive skin, leading to dry skin and discomfort. If your dog suffers from chronic itchy skin, consult your vet to narrow down medicated or specialized options that suit their needs.Practical examples help illustrate the point—dogs with hot spots or visible skin irritation often respond dramatically to oatmeal and aloe-based dog shampoos, while more severe skin infections may need a medicated dog shampoo prescribed by your veterinarian. No matter the case, gentle formulas with skin barrier support are key for achieving healthy, lustrous fur and fewer vet trips.Key Features in Dog Shampoos for Sensitive SkinImportance of natural ingredients like colloidal oat and aloe vera : These components help soothe inflamed, irritated skin and promote healing.Benefits of hypoallergenic shampoo for dogs : Such formulas reduce the risk of allergic reactions, making bath time stress-free for dogs prone to itchy skin or dry skin.How medicated dog shampoo targets canine skin conditions : Medicated options are designed to treat skin infections, yeast, and other persistent issues, ideal for dogs with chronic skin problems.Common Causes of Itchy Skin in Dogs and the Role of Sensitive Skin Dog ShampooEnvironmental allergens and skin infections can trigger itchy skin, causing your dog to scratch, lick, or chew excessively.Underlying skin infections like bacterial or fungal invaders further damage sensitive skin and may require medicated dog shampoo for relief.Dry skin not only causes discomfort but also dampens your dog’s coat shine, emphasizing the importance of gentle, hydrating ingredients.Effective sensitive skin dog shampoos act as a first line of defense against these triggers, cleansing and calming the skin without stripping away natural oils. Colloidal oat and aloe vera remain go-to ingredients for soothing and protecting irritated skin.Addressing the root of skin conditions early helps keep recurring skin infections and itchy skin at bay, making skincare an essential part of your dog's overall health routine.Quick Table: Features to Compare When Selecting the Best Dog ShampooBrandMain IngredientSuited for Itchy SkinSkin Condition SupportSensitive Skin SafeMedicated (Yes/No)Paraben-FreePriceCalmPaws Oat & AloeColloidal Oat, Aloe VeraYesDry Skin, Hot SpotsYesNoYes$$VetDerm Medicated ReliefChlorhexidineYesSkin InfectionsYesYesYes$$$PureNature GentleCoconut Oil, OatYesDry SkinYesNoYes$TickSafe NaturalNeem, Lemon OilYesFlea & TickYesNoYes$$PuppyKind HypoallergenicOat, ChamomileYesMild AllergiesYesNoYes$$10 Best Shampoos for Dogs with Sensitive Skin Ranked1. Oatmeal and Aloe: Calming Colloidal Oat Dog ShampooOatmeal and aloe dog shampoos are top picks for what’s the best shampoo for dogs with sensitive skin. Colloidal oat provides immediate relief for itchy skin and locks in moisture, while aloe vera calms inflammation and speeds healing. These gentle formulas avoid irritating chemicals and are safe for frequent bath time use, making your dog’s skin and coat feel silky and comfortable.When choosing a dog shampoo for dry skin or frequent hot spots, this option helps restore skin barrier function. Look for transparent ingredient lists and certifications for hypoallergenic standards—the fewer the additives, the better for sensitive skin dogs.Many pet owners report reduced scratching, shinier coats, and a marked decrease in recurring skin irritation after the first few washes with this soothing shampoo formula.2. Medicated Dog Shampoo with Chlorhexidine for Skin Infection ControlMedicated dog shampoos with ingredients like chlorhexidine are a trusted solution for dogs battling chronic skin infections. These dog shampoos target fungal and bacterial issues directly, reducing hot spots, red patches, and itching associated with skin conditions.This type of shampoo for dogs with sensitive skin is often recommended by veterinarians when over-the-counter options are not enough, particularly in cases of resistant or recurring skin infections. Chlorhexidine acts fast, while secondary soothing ingredients prevent further irritation and support the skin’s natural defenses.Ideal for use after consulting your vet, these medicated dog shampoos help break the cycle of skin issues without being overly harsh. Always follow the recommended usage schedule and monitor your dog’s progress.3. Hypoallergenic Dog Shampoo with Natural Ingredients for Sensitive SkinHypoallergenic dog shampoos masterfully blend gentle surfactants with natural ingredients, avoiding the common irritants found in many pet store brands. These shampoos are formulated to reduce the risk of allergic reactions, making them essential for dogs with chronic sensitivity or a history of skin irritation.Main ingredients like oatmeal, aloe vera, and chamomile efficiently cleanse while nourishing the skin and coat, minimizing disruptions to the skin barrier. Hypoallergenic shampoos provide peace of mind—especially for puppies and seniors where sensitive ski and skin infections are more common.Choosing hypoallergenic formulas means fewer vet visits, less scratching, and a happier pet. They’re a smart investment in your dog’s lifelong skin health.4. Flea and Tick Shampoo for Dogs with Sensitive Skin ConcernsFlea and tick shampoos crafted specifically for sensitive skin give your pet powerful pest protection without harsh side effects. These formulations skip common chemicals that can trigger skin irritation, instead incorporating botanical oils like neem or lemon for natural flea and tick repellence.When evaluating a flea and tick shampoo, look for products with natural ingredients, labeled hypoallergenic, and designed to soothe as they protect. Use them as directed, ideally in combination with spot-on flea and tick treatments tailored for sensitive ski.Regular use keeps hot spots, itchy skin, and recurring infections at bay—especially useful during peak flea and tick seasons.5. Coconut Oil Infused Dog Shampoo for Dry Skin ReliefCoconut oil is a celebrated natural ingredient in dog shampoos for its hydrating and antibacterial properties, making it excellent for dogs with dry skin or frequent skin issues. Shampoos infused with coconut oil moisturize deeply, leaving your dog's coat soft and shiny while preventing further drying or flaking.Coconut oil-based formulas are especially helpful after medicated treatments or in between vet visits, restoring comfort and health to the skin and coat.The scent is mild and pleasant too, making bath time more enjoyable for both you and your furry companion.6. Vet’s Recommended Dog Shampoo for Itchy Skin and Hot SpotsVeterinarian-recommended dog shampoos target the causes of itchy skin and hot spots with precision, often combining medicinal strength with conditioning natural elements. These products are rigorously tested to ensure safety for dogs with sensitive skin, making them a strong choice for pets with chronic skin conditions or prone to skin infections.Common active ingredients include colloidal oat, chlorhexidine, or moisturizing oils; all proven to provide lasting relief and support a resilient skin barrier.Always follow your vet’s advice regarding frequency of use, especially if your dog experiences persistent or unexplained skin irritation.7. All-Natural Tick Shampoo Safe for Dogs with Sensitive SkinFor pet parents wary of harsh chemicals, all-natural tick shampoo provides an effective, gentle solution. These dog shampoos rely on plant-based ingredients to repel parasites while conditioning the fur and calming irritated skin.They are formulated without synthetic preservatives or fragrances, making them a safe routine defense against both pests and flare-ups for dogs with sensitive skin.Consistent use supports overall skin health, decreases the risk of skin irritation and ensures your dog can play outdoors without discomfort.8. Medicated Shampoo for Managing Chronic Skin ConditionsFor dogs with long-term or recurring skin conditions like dermatitis or fungal infections, a medicated shampoo prescribed by your veterinarian may be necessary. These medicated dog shampoos contain therapeutic agents that specifically address severe itchiness, red patches, and secondary infections.They are best used as part of a holistic treatment plan from your vet, combining oral medications, dietary changes, and targeted bathing for maximum relief.Careful monitoring is crucial—overuse can sometimes lead to dryness. But when used properly, these products can be transformational for dogs with stubborn skin issues or chronic irritation.9. Puppy-Safe Sensitive Skin Dog ShampoosPuppies’ delicate skin is prone to irritation, making gentle, puppy-specific dog shampoos vital. Look for formulas clearly labeled as safe for puppies, ideally with oatmeal, aloe vera, or chamomile as main ingredients. These cleansers are designed to be gentle on the eyes and nose, perfect for a stress-free bath time.Choosing a mild, non-irritating shampoo early in your puppy's life sets the foundation for a healthy skin and coat into adulthood. They also help reduce shedding and potential allergic reactions in sensitive breeds.If your puppy develops any signs of itchiness after a bath, consult your vet. Often, simply switching to a puppy-specific hypoallergenic formula solves the problem.10. Luxury Dog Shampoos: Premium Ingredients for Sensitive Skin and CoatWhen only the best will do, luxury dog shampoos combine premium natural ingredients like shea butter, jojoba oil, and even silk proteins for maximum pampering. These formulas are made for owners who want top-tier results—think show dogs, therapy pets, or simply spoiled pups.Besides a pleasant scent and silky finish, luxury shampoos often include advanced skin barrier technologies and no artificial additives or harsh preservatives.For some dogs, these high-end options can make bath time a soothing spa experience—worth the investment for sensitive skin that needs extra TLC.Comparing Medicated Dog Shampoo vs. Natural Formulas for Sensitive SkinWhen to Choose Medicated Dog Shampoo for Skin InfectionsMedicated dog shampoo is essential when your dog’s sensitive skin is troubled by ongoing skin infections, persistent red patches, or severe itchy skin. These shampoos often include chlorhexidine or other antiseptics to address specific medical needs. Consult your vet to confirm an infection and follow all application guidelines, as misuse can worsen dry skin or cause additional skin irritation.For milder skin conditions or preventive care, regular medicated use isn’t recommended—natural or hypoallergenic shampoos are safer. Medicated treatments work best for acute flare-ups, chronic skin infections, or as prescribed support for long-term skin issues.Advantages of Using Natural Ingredients in Sensitive Skin ShampoosNatural dog shampoos leverage the healing properties of ingredients like colloidal oat, aloe vera, and coconut oil. These formulas clean efficiently while minimizing skin irritation and supporting the skin barrier. They are particularly suitable for dogs who need regular baths, puppies, or breeds with a genetic tendency toward sensitive ski.Benefits include locking in moisture, calming itches, reducing allergic reactions, and preventing future hot spots. Many owners notice softer coats, less scratching, and healthier skin overall with a natural ingredient-based shampoo for dogs."Selecting the right shampoo for your dog’s sensitive skin is the first step toward promoting lifelong comfort and preventing chronic skin infections." – Dr. Elise Martin, DVMHow to Properly Bathe a Dog with Sensitive Skin for Best ResultsTips for effective bath time: Always brush your dog before starting to remove tangles and debris that could irritate the skin during washing.Water temperature and lathering advice: Use lukewarm water, as water that is too hot or cold can worsen skin irritation. Lather gently to avoid causing micro-abrasions on sensitive skin.Aftercare for dogs with skin conditions: Pat your dog dry with a soft towel and avoid using hair dryers directly on the skin. Moisturize with a vet-approved leave-in conditioner if needed.Regular and gentle bathing is crucial. Too frequent baths can strip away natural oils, while too few may let allergens or irritants accumulate on your dog’s sensitive skin and coat.If you notice redness, increased scratching, or a dull coat after a bath, consult your veterinarian. They can help you adjust your routine or recommend a medicated dog shampoo if underlying skin infections are suspected.What to Avoid: Ingredients Harmful for Sensitive Skin in Dog ShampoosParabens, sulfates, and artificial fragrancesPotential skin and coat damage from harsh chemicalsSteer clear of shampoos that list parabens, sulfates, and artificial dyes or perfumes among their ingredients. These components are notorious for disrupting the skin barrier, causing allergic reactions, and triggering chronic skin conditions. Always read the label and choose products designed for sensitive ski.Sensitive skin dog shampoos should prioritize minimal, natural ingredients and avoid unnecessary chemical additives. If in doubt, consult your vet or opt for vet-recommended brands.Signs Your Dog Needs a Sensitive Skin Dog ShampooScratching, licking, and red patchesHot spots, dry skin, and dull coatRecurring skin infections or allergic reactionsSudden increases in scratching, chewing or licking stress areas, and visible red or scaly patches can all signal your dog is suffering from sensitive skin. A dull coat, bald spots, or recurring skin infections also point to the need for a switch to a sensitive skin-safe dog shampoo.Always address these symptoms early; left untreated, skin issues can escalate into serious infections or systemic allergic reactions.What’s the Best Shampoo for Dogs with Sensitive Skin? Expert Advice from Veterinarians"Look for dog shampoos featuring colloidal oat and avoid dye or unnecessary additives—these simple swaps can make a world of difference." – Dr. Sandra Holmes, Veterinary DermatologistVeterinarians universally agree that hypoallergenic dog shampoo featuring colloidal oat, aloe vera, or coconut oil are best for dogs suffering from itchy skin or chronic sensitivities. Avoiding dyes, parabens, and fragrances sets your dog up for success and makes bath time a positive experience.If itchiness, redness, or hot spots persist even after switching shampoos, consult your vet. They may recommend a specialized medicated dog shampoo or test for underlying allergies.Remember: The right dog shampoo is as important as what food or treats you select, as it keeps your dog’s skin, coat, and overall wellness at its best.Best Practices: Keeping Your Dog’s Skin and Coat Healthy After BathingImportance of regular brushing: Brushing your dog daily or weekly helps distribute skin oils, remove allergens, and keep the coat shiny.Diet tips for improving skin condition: Feed a balanced diet rich in omega fatty acids (found in fish oils and flaxseed) to boost skin and coat health from the inside out.Using flea and tick treatments designed for sensitive skin: Always select pest control solutions labeled as safe for dogs with sensitive ski to prevent further irritation.These simple habits give lasting results, helping your dog stay comfortable and reducing the risk of future skin infections or irritations.What is the best thing to wash a dog with sensitive skin?The best thing to wash a dog with sensitive skin is a hypoallergenic dog shampoo that contains natural ingredients like oatmeal and aloe vera, avoids sulfates and parabens, and is designed to soothe and protect the skin without stripping natural oils.What is the best dog shampoo for dogs with sensitive skin?The best dog shampoo for dogs with sensitive skin will have gentle cleansers, natural moisturizers, and be free from harsh additives. Oatmeal, aloe, and coconut oil are frequently cited by vets for dogs with chronic sensitivity.What do vets recommend for dogs with itchy skin at home?Most veterinary experts recommend medicated dog shampoo for cases of severe itchy skin, or natural ingredient-based shampoos for mild to moderate skin sensitivities. Always consult your vet if symptoms persist.What dog shampoo to avoid?Avoid dog shampoos containing artificial fragrances, parabens, sulfates, and dyes. These ingredients may worsen sensitive skin, cause irritation, or contribute to skin infections.Frequently Asked Questions About What’s the Best Shampoo for Dogs with Sensitive Skin?How often should I bathe my dog with sensitive skin? Bath dogs with sensitive skin once every 3-4 weeks unless otherwise advised by your vet. Overbathing can dry the skin and worsen irritation.Can human shampoo be used on dogs? No—human shampoo disrupts a dog’s skin pH balance and can lead to dryness, irritation, or even allergic reactions. Always use a dedicated dog shampoo designed for sensitive skin.Are medicated dog shampoos safe for regular use? Medicated dog shampoos are safe when used as directed by your vet. For long-term maintenance, alternate with a mild natural shampoo to avoid overtreatment.What’s the difference between medicated and natural dog shampoo formulations? Medicated shampoos are formulated to treat specific skin infections and conditions, containing antifungal or antibacterial agents. Natural dog shampoos use gentle, plant-based ingredients suited for daily cleansing and preventive care.Summary of the Best Dog Shampoos for Sensitive SkinSensitive skin shampoos optimize your dog’s health and comfortAlways check for soothing natural ingredients such as colloidal oat and aloe veraVet-recommended products provide additional peace of mindAvoid harsh chemicals to prevent skin infections and flare-upsReady to Find Your Dog's Perfect Match?Love pets as much as we do? Join our monthly newsletter for tail-wagging tips, adorable stories, and smart pet care hacks. 🐾 Subscribe now — it's paws-itively free!Actionable Tip: Before your next bath time, review the ingredient list on your dog’s current shampoo. If you spot any parabens, sulfates, or fragrances, it’s time to upgrade to a gentle, natural, or vet-recommended formula!When selecting the best shampoo for dogs with sensitive skin, it’s crucial to choose products formulated with gentle, natural ingredients that soothe and protect without causing irritation. Here are some top recommendations:Earthbath Oatmeal & Aloe Dog Shampoo This hypoallergenic shampoo combines colloidal oatmeal and aloe vera to relieve itching and moisturize dry skin. It’s soap-free, pH-balanced, and free from parabens and synthetic fragrances, making it ideal for dogs with sensitive skin. ( businessinsider.com )Vet’s Best Hypo-Allergenic Dog Shampoo Formulated with aloe vera and vitamin E, this gentle shampoo cleanses without drying out the skin. It’s free from parabens, dyes, and fragrances, providing relief for dogs prone to allergies and skin sensitivities. ( thedodo.com )Burt’s Bees Oatmeal Dog Shampoo Made with colloidal oatmeal and honey, this natural shampoo soothes and softens the skin while conditioning the coat. It’s pH-balanced and free from sulfates and colorants, suitable for dogs with sensitive skin. ( thedodo.com )TropiClean Gentle Coconut Hypoallergenic Shampoo This soap-free shampoo uses coconut-based cleansers and aloe extract to gently clean and moisturize sensitive skin. It’s free from dyes and parabens, leaving a light, natural scent. ( rover.com )4-Legger Organic Dog Shampoo USDA-certified organic, this shampoo contains aloe vera and lemongrass essential oil to soothe and cleanse sensitive skin. It’s free from synthetic chemicals, making it a safe choice for dogs with allergies. ( hairydogwash.com )When bathing your dog, always ensure thorough rinsing to remove all shampoo residues, as leftover product can irritate sensitive skin. Consult with your veterinarian before trying a new product, especially if your dog has a history of skin issues or allergies.

08.14.2025

Why Is My Cat Shedding So Much? Here’s How to Stop It

Ever wondered, 'Why is my cat shedding so much?' Explore surprising facts about cat shedding and learn proactive steps to reduce excessive shedding for a happier, healthier cat.Understanding Why Is My Cat Shedding So Much? The Science of Cat SheddingHave you ever noticed tufts of cat hair on your couch or found clumps of fur in unexpected places? If you’re asking why is my cat shedding so much , you’re definitely not alone. Shedding is a natural process in cats, but when it seems excessive, it can be a cause for concern for pet parents. The good news is that most shedding is perfectly normal, and understanding the reasons behind it can help you take the right steps to manage your cat’s coat and skin health.Cats shed old or dead hair to make room for new growth. This process not only keeps their fur soft and clean but also regulates body temperature and helps distribute natural oils for a glossy coat. However, the amount a cat sheds can vary depending on genetics, breed, age, environment, and even stress levels. Knowing what’s typical for different cat breeds and seasons will help you determine if your cat shedding is normal or a sign of a potential health issue.Decoding Cat Hair Loss: Shedding in Cats vs. Hair Loss ConditionsNot all fur loss in cats is the same. Shedding in cats is a controlled process that removes dead hair , making way for a soft, healthy coat. However, abnormal hair loss , such as sudden bald spots or a bald patch , may indicate medical conditions like ringworm, allergies, or hormonal imbalances. While cats shed to maintain optimal coat and skin health, distinguish between normal cycles and excessive, patchy fur loss. Smooth, distributed loss is typically normal, while isolated or inflamed bald spots require attention.If you spot more hair than usual around the house or notice your cat is shedding in chunks (especially with red or irritated skin), monitor closely. Common causes of excessive cat hair loss include parasites, fungal infections, dietary deficiencies, and stress. Timely intervention ensures your cat gets the care needed while preventing excessive cat shedding from escalating into a serious problem.What Makes Cats Shed More? Key Drivers Behind Cat SheddingWhile all cats shed , certain factors can trigger episodes of increased shedding. Changing seasons, diet, stress, underlying health issues , and household environmental changes (like artificial lighting or temperature shifts) all play a role. For instance, in the spring and fall, cats often lose their winter coat as their bodies adjust to daylight and temperature.Nutrition also significantly impacts cat shedding. Cats on low-quality cat food may lack essential nutrients, making them shed a lot more. Additionally, emotional stress—caused by moves, new pets, or changes to the household—can lead to more fur loss. Monitoring your cat’s environment and well-being helps prevent unnecessary, excessive shedding.Shedding Is Normal: Recognizing Healthy Cat Shedding PatternsFor most cat owners, the sight of stray hairs around the house isn’t unusual. In fact, shedding is normal and a sign that your cat’s body is functioning just as it should. Regular cycles keep their coats free of dead hair and maintain healthy skin. Indoor cats may shed consistently throughout the year, while outdoor cats display more defined seasonal patterns.What you should look for is the pattern and amount of fur loss. Smooth, even shedding, especially during seasonal changes, is typical. If your cat’s fur feels soft and you don’t spot bald patches or inflamed skin, you’re likely seeing the healthy version of cat shedding.Seasonal and Increased Shedding in Cats: When to Expect ItMost cats shed the most during spring and fall, when days get longer or shorter, prompting their bodies to shed the heavier winter coat and prepare for temperature swings. Seasonal shedding is influenced by changes in sunlight (even artificial lighting in homes) and temperature, so it isn’t exclusive to outdoor cats. Expect to find more fur around your house, especially during these peak months as your cat transitions between winter and summer coats.With indoor cats sheds , the cycles can occur more unpredictably because heating, AC, and lighting keep their environment steady. Such cats may not have a dramatic shed-all-at-once phase but will instead lose hair steadily. Being aware of these natural cycles makes it easier to take action only when shedding seems truly excessive.How Different Cat Breeds Shed: Long-Haired vs. Short-Haired CatsNot all cats are created equal when it comes to shedding. Long-haired cat breeds , such as Maine Coons or Persians, have more fur to lose and may appear to shed more simply due to the length and density of their coats. Short-haired cats , like American Shorthairs or Siamese, also shed, but the shorter length makes it less noticeable.Some cat breeds are notorious for fur loss, while others shed very little. Recognizing your cat’s genetic and breed-specific shedding tendencies helps set realistic expectations. Regardless of breed, regular grooming reduces loose hair and supports healthy coat and skin , further lowering the odds of excessive shedding.Excessive Shedding: Warning Signs That Your Cat Is Shedding Too MuchWhile shedding is a natural process , there are times when it can signal an underlying issue. Excessive shedding goes beyond the regular molt—it may indicate problems with your cat’s overall health, diet, or stress level. Recognizing when your cat shedding turns problematic is crucial for your pet’s wellness.Red flags include sudden increases in fur loss, persistent bald or thinning patches, sore or scabby skin, or behavior changes like excessive licking or scratching. If you spot these, it’s time to dig deeper into what might be causing your cat’s hair loss.When Shedding Indicates a Health Issue in CatsExcessive shedding can be one of the first signs of an underlying medical issue. Causes include parasites such as fleas or mites, allergies (to cat food or the environment), hormonal imbalances like hyperthyroidism, or fungal infections such as ringworm. Stress, anxiety, and sudden changes at home can also manifest as fur loss in your cat.Watch for additional symptoms such as poor appetite, changes in weight, lethargy, incessant scratching, or the appearance of red, inflamed skin and sores. These signs suggest it’s more than a natural molt—seeking veterinary evaluation ensures prompt management of a potential health issue.If your cat is shedding excessively and has bald spots, a vet can rule out both medical and nutritional factors. Timely action makes all the difference in supporting your cat’s comfort and overall health.How to Identify Unusual Cat Hair Loss and Excessive Cat SheddingDifferentiating between normal and abnormal shedding starts with a careful look at your cat’s coat. Is the loss even? Are there bald patches or broken skin? Do you notice more fur clumps than usual without any seasonal trigger? Documenting when and how your cat sheds can help you and your vet determine if it’s normal seasonal cat shedding or something requiring intervention.Grooming time is a perfect opportunity to check your cat’s skin. Smooth, unbroken fur—even if there’s a lot of it—likely means all is well. Patchy fur, hair thinner in certain areas, or visible scabs raise concerns. Knowing your cat’s baseline makes it easier to spot early signs of excessive shedding or hair loss due to a medical issue.IndicatorNormal SheddingExcessive SheddingHair Loss/Medical IssueShedding PatternEven, seasonal or steady throughout the yearLarge fur clumps, throughout the year, not just seasonallyPatchy, sudden loss, bald spotsSkin HealthHealthy, unbroken, softPossible minor irritation, drynessRedness, sores, lumps, infectionsBehaviorGrooms normallyIncreased licking or scratchingObsessive licking, visible distressOther SymptomsNoneSome itching or minor discomfortLoss of appetite, lethargy, weight changeTop Expert Strategies To Reduce Shedding in CatsIf you’re tired of fur tumbleweeds under your sofa, take charge with proven strategies to reduce shedding. These solutions boost not only cleanliness but also your cat’s health and comfort. Consistency—and understanding your cat’s unique needs—are key.Expert strategies blend good grooming habits, smart dietary choices, and changes to your cat’s environment. Implementing a holistic approach helps minimize cat hair buildup and makes your house a cleaner, more inviting home for both you and your furry friend.Optimal Grooming Techniques to Manage Cat SheddingThe cornerstone of a healthy, low-shedding cat coat is regular grooming. Aim for gentle brushing daily—especially during peak seasonal shedding times. Choose a brush type tailored to your cat’s length and cat breed : slicker brushes for long-haired, short-bristled ones for shorthairs. Grooming removes loose hair, spreads natural oils , and also lets you detect early signs of skin or health issues.Complement brushing with occasional baths, but use cat-safe shampoos to avoid drying out the cat’s skin. Always observe your cat’s reactions—stressful grooming can backfire and lead to more fur loss. Gentle grooming routines not only help reduce shedding but also strengthen the bond between you and your pet.Diet and Nutrition Tips to Reduce Cat SheddingDiet plays a critical role in your cat’s skin and coat health. Feeding high-quality cat food packed with omega-3 and omega-6 fatty acids supports a shiny, resilient coat and minimizes fur loss. Ensure the food contains enough animal protein, as well as vitamins like A, E, and biotin—all are essential for strong follicles.Hydration is just as important. Make sure your cat always has access to fresh water. If your cat suffers from food allergies or digestive issues, working with your vet to tailor a specific diet helps reduce shedding and ward off pesky hair loss problems.Environmental Factors That Can Increase Shedding in CatsChanges in living conditions can lead to increased shedding. Cats react to stress, abrupt temperature flux, or artificial lighting that alters their biological rhythms. Maintain a stable, comfortable indoor temperature and avoid loud noises or sudden household shifts.Humidity also matters: too dry an environment makes shedding in cats worse, while too much dampness can invite skin infections. Use humidifiers and air purifiers to keep your home and your cat’s fur in top shape. Comfort and stability keep your cat shedding within healthy bounds.Should I Be Concerned if My Cat Is Shedding a Lot?Discover when to speak to a veterinarian about cat shedding and what symptoms require medical attention.It’s natural to worry when you see your cat shed more than usual. But remember: most cats shed year-round—some breeds just shed a lot! You should be concerned if shedding in cats comes with bald spots, redness, sores, behavior changes, or appears suddenly and dramatically. Seek veterinary care for unexplained hair loss or other concerning symptoms. Early intervention keeps your feline friend comfortable and healthy.How Do I Stop My Cat From Shedding So Much Fur?Daily Brushing: Removes dead hair and spreads natural oils for a glossy coat.Bathing: Occasional baths with cat-safe shampoos keep skin clean and help loosen loose hair.Upgrade Cat Food: Feed a nutritious, balanced diet packed with essential fatty acids to support coat and skin health.Reduce Stress: Maintain a stable, low-stress environment—routine changes can trigger excessive shedding.Check for Health Issues: Consult your veterinarian if shedding is sudden, severe, or accompanied by other symptoms.Use Shedding Tools and Products: Invest in lint rollers, grooming gloves, or specialized deshedding tools for maximum reduce shedding effect.What Month Do Cats Shed the Most? Understanding Seasonal Shedding in CatsPeak Shedding Months: March through May for spring shedding; September through November for fall shedding. During these months, cats lose their heavier winter coat or prep for cooler weather.Simple Grooming Recommendations by Season:Spring: Increase brushing frequency to daily.Summer: Bathe occasionally and keep the cat cool.Autumn: Brush regularly; check for dry skin as heating systems start up.Winter: Use humidifiers and monitor for skin dryness.“Regular grooming is the single most effective way to manage shedding and keep your cat’s coat healthy.” – Veterinary DermatologistFAQs About Why Is My Cat Shedding So Much?Is cat shedding normal? Yes, most cats shed to get rid of dead or loose hair as part of a healthy cycle. The amount varies by breed , season, and environment. Consistent, distributed shedding without bald spots is expected in healthy felines.When should you worry about excessive shedding? Excessive shedding is concerning if your cat develops patchy hair loss , sore or inflamed skin, a sudden change in behavior, or other health changes. In these cases, check with your veterinarian.How often should you groom your cat for optimal results? Brush daily during shedding peaks (spring/fall) and at least 2–3 times per week year-round. Regular grooming not only manages cat hair but also benefits the bond between you and your cat.Key Signs Your Cat's Shedding Is Normal vs. ConcerningNormal: Even fur loss, soft skin, no sores or red patches, regular grooming.Red Flags: Sudden bald spots , scabs, inflamed skin, over-grooming, behavior changes, or rapid weight fluctuation.How Cat Shedding Affects Your Home and Solutions for CleanlinessCat fur can find its way into every corner of your house—from couches and rugs to clothing. Excessive cat hair buildup can trigger allergies, block air vents, and make housekeeping a challenge. The key to managing shed a lot -type shedding is a combination of consistent cleaning routines and specialized products.Lint rollers, vacuum cleaners with pet hair attachments, and washable throws for furniture catch fur before it gets out of hand. Grooming your cat regularly and keeping air filters clean go a long way toward maintaining a fur-free home, even with multiple indoor cats.Best Products: Lint rollers, high-powered vacuums, sticky furniture pads, air purifiers.Home Hacks: Place washable blankets on couches, change filters often, use anti-static sprays, groom cats in a contained space for easy cleanup.Quick Recap: Important Takeaways on Why Is My Cat Shedding So Much?Recognize the difference between normal and excessive sheddingMonitor your cat’s skin and behavior for red flagsAdopt proven solutions: regular grooming, dietary improvements, and stress reductionConsult your vet when in doubt—it pays to catch health issues earlyWant More Advice on Cat Shedding? Stay Ahead of Your Cat's Wellness NeedsCaring for your pet just got easier. Get expert advice, product tips, and pet wellness updates delivered monthly. 🐾 Sign up today and stay one paw ahead.Conclusion: Prioritize grooming, nutrition, and regular vet checks to reduce cat shedding and keep your home—and your cat—happy and healthy.To further enhance your understanding of why your cat may be shedding excessively and how to manage it, consider exploring the following resources:“Excessive Shedding in Cats” by Hill’s Pet provides insights into common causes of increased shedding, such as low-quality food, health issues, and stress, along with practical solutions to address them. ( hillspet.com )“Cat Shedding: Why is Your Cat Shedding So Much?” by Purina US delves into factors like seasonal changes, breed differences, and stress that influence shedding, offering guidance on when to consult a veterinarian. ( purina.com )These articles offer comprehensive information to help you identify potential causes of your cat’s shedding and implement effective strategies to manage it.

08.01.2025

Transform Bath Time into a Bonding Experience for You and Your Dog

Update Why Bath Time Matters for Your Dog's Health Bathing your dog isn't just about keeping them clean; it's crucial for their overall health. Regular baths help remove dirt, allergens, and parasites that can lead to skin issues or health problems. Keeping your dog's coat clean also promotes a healthy skin barrier, which can be vital for dogs with sensitive skin. Create the Perfect Bathing Atmosphere Your dog's bathing experience begins long before the water runs. To ensure a stress-free bath, setting up the right environment is essential. This means choosing a location that your dog feels comfortable in—whether it's the laundry room, bathtub, or even outside on a warm day. Once you've selected the spot, ensure it's safe with non-slip mats to prevent any accidents. Gather Necessary Supplies for a Seamless Experience Preparation is key! Before you begin, gather all your supplies within easy reach. You'll need dog-specific shampoo, plenty of towels, a brush, and perhaps calming aids to reduce anxiety. Having everything at your fingertips minimizes the chance of leaving your pup unattended and helps to keep the process smooth. Exert Your Dog's Energy with Play Perhaps one of the most effective ways to ensure a calm bath time is to let your dog get some exercise beforehand. Going for a brisk walk or engaging in a game of fetch helps expend energy and makes your dog more compliant and relaxed during their bath. Just be sure not to overdo it—aim for a happy medium. Pre-Bath Grooming: A Step You Shouldn’t Skip Brushing your dog before the bath is not only beneficial for their coat but is a crucial step that should not be overlooked. This helps to remove tangles and mats, reducing shedding and preparing the fur to absorb shampoo effectively. It also distributes the natural oils in their coat, promoting a healthy appearance. Set the Mood for a Calming Experience Creating a soothing ambiance can work wonders in reducing your dog's anxiety. Consider playing gently soothing music or incorporating calming scents, such as lavender. Softly spoken tones from you can reassure your pet, making them feel more at ease. These little touches can make bath time a positive experience rather than a dreaded chore. Make Bathing Fun: Techniques to Try Transform bath time into a bonding experience! Using treats is a great way to reward your dog for positive behavior during the bath. You might also try bringing some of their favorite toys into the bathing area to distract them and make the experience feel less clinical. Post-Bath Love and Attention After washing, it’s vital to celebrate your dog’s bravery and cooperation. Take the time to dry them off thoroughly and perhaps offer a little extra cuddling session or play-time as a reward. This not only strengthens your bond but also reinforces the idea that bath time can be fun. Overall Benefits of a Stress-Free Bath Time A well-conducted bath not only keeps your dog clean but fosters a healthier bond between you and your most loyal companion. By transforming this task into a fun, gentle, and relaxed experience, you're ensuring your dog feels loved and secure. In conclusion, a stress-free bath for your dog is within reach with these simple strategies! Remember, bathing shouldn’t just be a chore; it can be a delightful opportunity for connection. For more grooming tips and advice, don’t hesitate to explore our resources!

Terms of Service

Privacy Policy

Core Modal Title

Sorry, no results found

You Might Find These Articles Interesting

T
Please Check Your Email
We Will Be Following Up Shortly
*
*
*